Your gaming PC’s graphics card, otherwise known as a GPU, is one of its most important components, and it’s important to periodically check its temperatures to ensure longevity. Temperature is the primary factor affecting its decay, and you want it to last a long time — especially in today’s market, where even the best graphics cards aren’t cheap.
Fortunately, keeping an eye on its temperatures isn’t difficult and can be accomplished in just a few moments with helpful tools. But there are a few other things to keep in mind, so let’s dig in.
How to monitor your GPU’s temperature
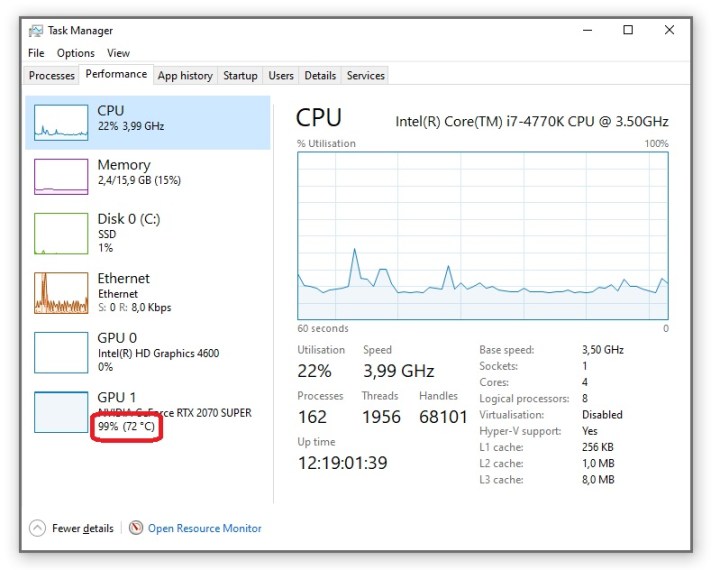
By far, the easiest tool to check your GPU’s temperature in Windows 10 can be found by firing up Windows Task Manager and jumping to the Performance tab. At the bottom of the list, you can find out what GPU you have in your system, where it is listed with its temperature between brackets. Use this to check your GPU temperature under a heavy gaming load, ensuring it is operating at or very close to 100% utilization.

But this isn’t the best tool, as it’s difficult to monitor in-game. The moment you Alt + Tab out of a game, the GPU temperature drops immediately, so you won’t be able to view a live reading like this unless you have a second monitor, making it difficult to see what your GPU’s temperature is like under load.

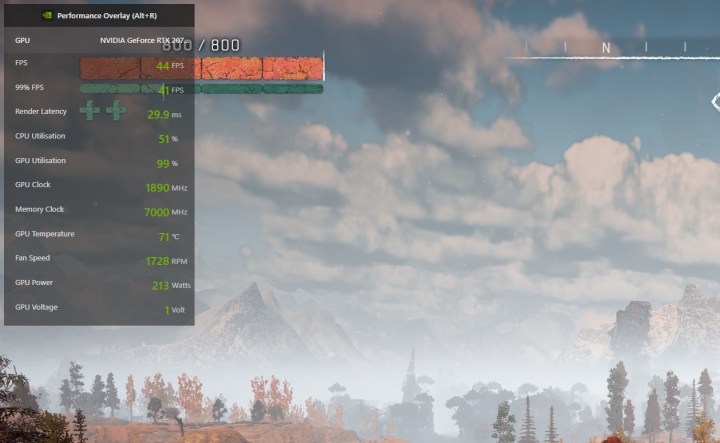
However, there is another tool that you may prefer that’s built into the Nvidia GPU drivers, and AMD’s GPUs have a similar utility. To get to Nvidia’s overlay, make sure you have GeForce Experience installed and are logged in. Use Alt + Z to open the overlay in-game, click the Cog icon on the right, and set up the advanced performance monitor in the corner of your choosing. It will look like the above window, and you can spot the GPU temperature on the fourth line from the bottom.
AMD’s GPUs also have an in-game overlay for monitoring hardware, and there are also alternative third-party monitoring tools such as HWiNFO, MSI Afterburner, and Evga’s Precision X1.
The real test is synthetic
All that being said, the aforementioned tools and tests generally don’t cut it entirely, as different games may lead to different temperatures. Or, if your processor isn’t up to snuff, some games may not even tax your GPU at 100%, which may give a false sense of security. Instead, the real test for whether a GPU’s cooling solution is adequate is to run Furmark, a brutal synthetic torture test built to bring out the worst of your GPU.

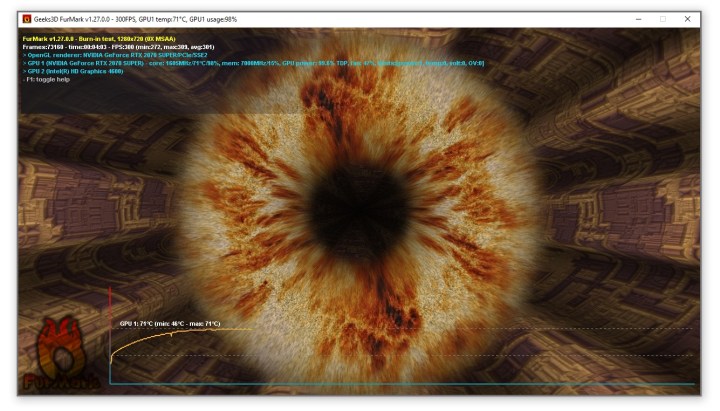
The test is easy to run — just install Furmark, open it, and run the test at standard settings. You should see a screen like pictured above. Let this run for about 10 to 15 minutes until the temperature has stabilized and you have a good idea of where you’re at. While running the benchmark, Furmark also tells you the GPU’s clock speeds, temperatures, and more.
Do keep in mind that Furmark is harder on the GPU than your average game, so it will bring out the worst and result in lower clocks than games generally achieve. Therefore, it is also a riskier test to run, and it does warn you about this before starting a test, but as long as you keep an eye on the temperatures and ensure they don’t exceed 90 degrees Celsius, there is nothing to fear.
Today’s GPUs target: 85 degrees Celsius
The vast majority of today’s graphics cards have a target temperature of about 82 to 85 degrees Celsius, meaning they will either overclock until they reach that temperature or have reached their maximum overclock. The reason for this is simple: If there is thermal headroom, the GPU will try to run at a higher frequency in order to boost performance and/or reduce fan speeds to quiet things down if the power limit has been reached.
But, this can make it a bit difficult to tell whether your GPU’s temperature is within norms. Of course, if the temperature you spot is below 80 degrees Celsius, you generally have no reason to worry — all is good — but if it is at exactly 85 degrees, it could be fine, but it could also be a sign of a problem.
This is because just as a GPU can overclock when it hasn’t reached the thermal threshold yet, it can also underclock itself as protection from overheating when it needs to. Therefore, if your GPU temperature is at or very close to 85 degrees, you will want to double-check whether its clock speeds match the design specifications.
Say you have a GPU with a base clock of 1605 MHz and a boost clock of 1770 MHz, which it happily boosts to 1890 MHz in Horizon Zero Dawn, and in the synthetic Furmark test, it runs at a perfect, on-point 1605 MHz, all at about 72 degrees. This is a healthy GPU.
However, if its temperature were to jump to 85 degrees, and its achieved clock speed under load were to drop far below the factory base clock of 1605 MHz, then there would be a problem.
One more thing to keep in mind is that although many tools don’t display it, some may display a “junction temperature” that comes out higher than the GPU temp reading you see elsewhere. This value measures the hottest temperature on your GPU rather than the GPU’s edge temperature, and while the higher figure may look scary, it’s not one you generally need to worry about unless you’re overclocking your GPU well beyond factory specifications.
So, what if the temperatures aren’t right?
If you find that your GPU runs at or above 85 degrees and its clock speed under load is lower than the advertised base clock, then there is work to be done. The first thing to check is whether there is enough airflow in your case and whether the dust filters have been cleaned. At the same time, check the GPU’s heatsink for dust buildup, and remove it if present. Clean your PC, reassemble, and test again. It’s also worth updating or installing a new GPU driver, just in case.
What if this doesn’t solve your GPU temperature problem? There is a high chance of bad contact between your GPU’s cooler and the GPU’s core itself, either from a bad install from the factory or dried-out paste from old age. Under heavy use, thermal grease will begin to dry out and degrade after about two years, and from then on, it can lead to significant performance loss from about four years onward.

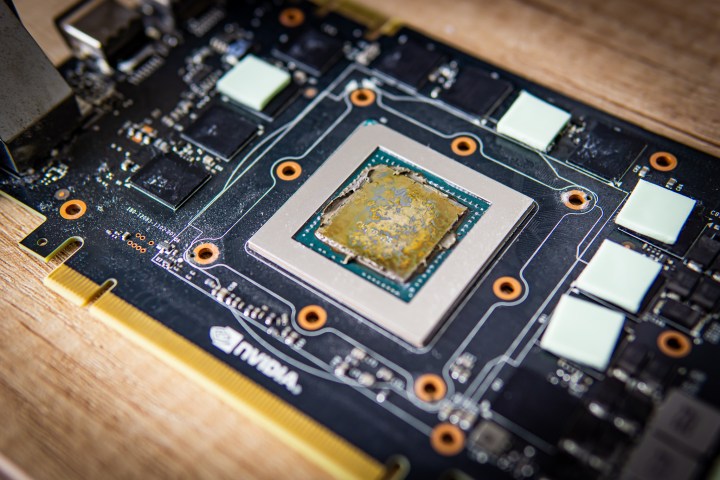
Pictured above is a GTX 780 Ti that was disassembled after about four years of leaving it untouched, and you can clearly tell that the thermal paste is no longer in order and needs to be replaced. After replacement, not only did the GPU run cooler, it also ran much quieter, as the GPU was finally able to properly move its heat into the heatsink for dissipation, which means its fan didn’t have to work as hard. Better yet, this also led to a significant performance increase.
Keep in mind that disassembling a GPU is a specialist procedure and is best done by someone with an affinity for disassembling electronics. If you’re not comfortable taking electronics apart and your GPU is still within its warranty period, your best bet is to send the card to the manufacturer for repair or bring it to a local PC hardware shop.
Understanding your GPU and its temperature
With all of this digested, you should be able to see that GPUs have an optimum temperature and a maximum temperature. Just like you can overclock a CPU, a GPU can also be overclocked, and many of the same constraints are in place.
If you are planning to overclock your graphics card, be sure to rely on the best GPU overclocking tools to keep the process simple, and your GPU temperature fully monitored.

