If you have multiple people using your Windows 11 PC, you can enable disk quotas so your users don’t end up using more than the allowed storage space. You can set a system-wide quota or a user-specific quota, as I’ll explain.
What Is Disk Quotas on Windows 11?
Disk quotas are a built-in Windows 11 feature that lets you specify the storage space user accounts on your system can use. This ensures one user doesn’t end up using the entire storage space on your computer.
You can set up a warning for users when their storage quota is exceeded. You can also completely prevent them from storing more files until they free up some disk space.
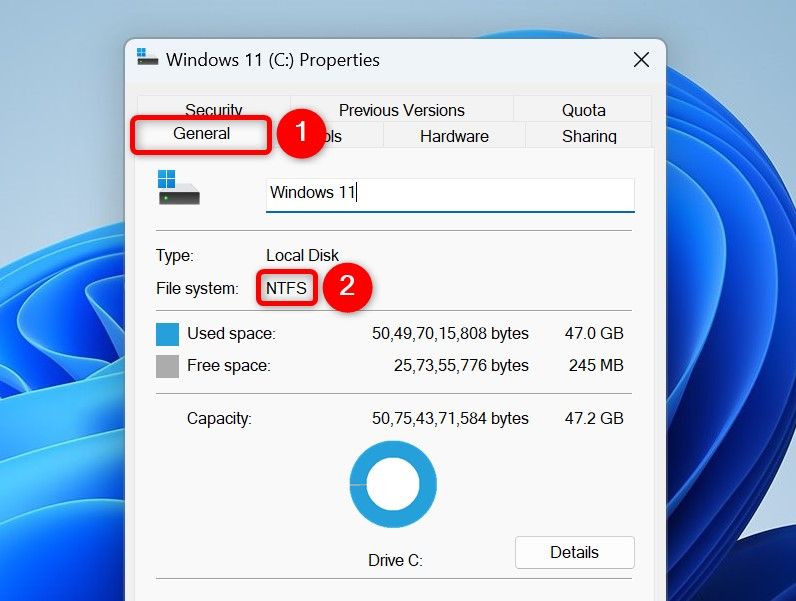
Note that this feature is only available on the drives formatted in the NTFS file system. To check if your drive is NTFS, open File Explorer (press Windows+E), right-click your drive, and choose “Properties.” Access the “General” tab, and next to File System, you’ll see your drive’s file system.
Also, you must be an administrator to enable disk quotas on your PC.
Set a Disk Quota for All Users
To apply the same disk quota limit for all users on your system, use this method.
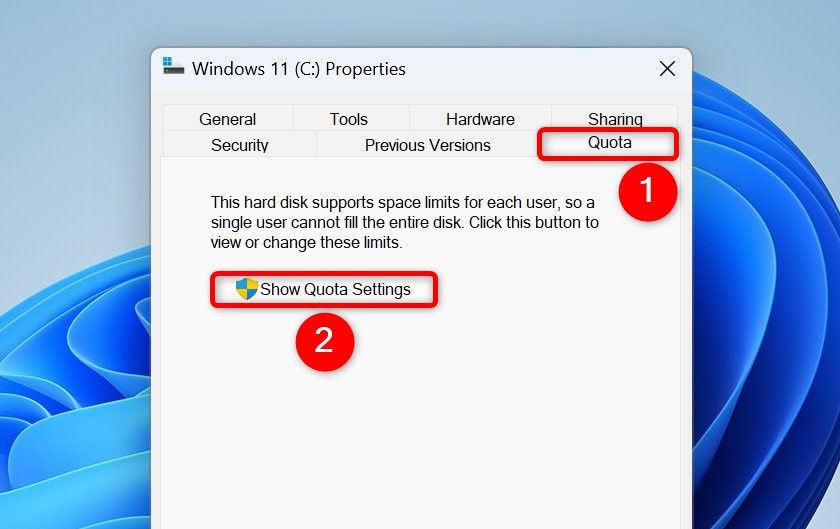
Launch File Explorer (press Windows+E), right-click your drive, and select “Properties.” Open the “Quota” tab and click the “Show Quota Settings” button.
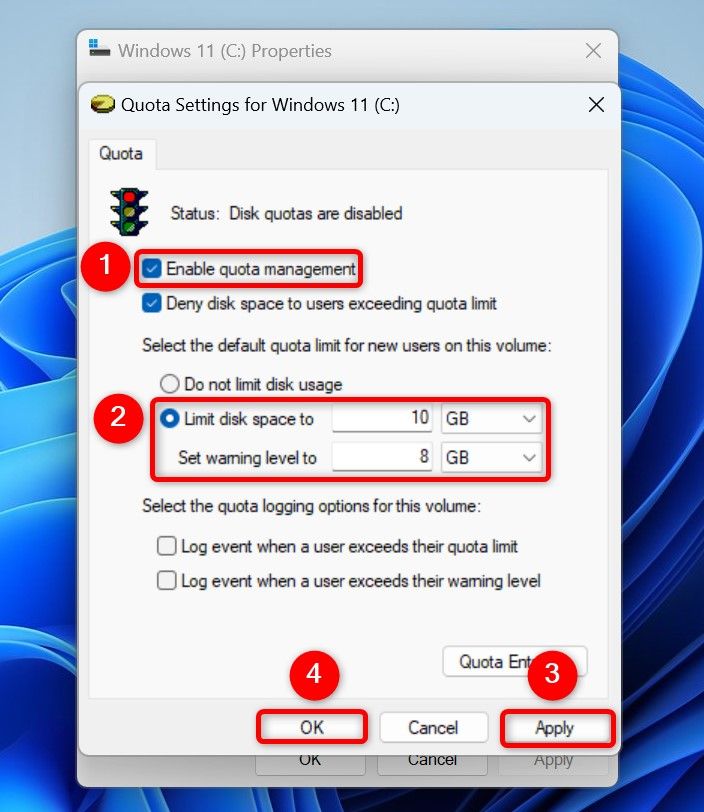
In the Quota Settings for [Drive Name] window, activate the “Enable Quota Management” option. Turn on the “Limit Disk Space To” option and type the quota you want to allow in the given field. From the drop-down menu, choose the appropriate unit. Choose the “Set Warning Level To” field and type the quota a user reaches before they get a notification about the quota usage. Again, choose the appropriate unit from the drop-down menu.
To strictly enforce the quota, so users can’t store more files, turn on the “Deny Disk Spaces to Users Exceeding Quota Limit” option. Then, choose “Apply” followed by “OK.”
Set a Unique Disk Quota for Specific Users
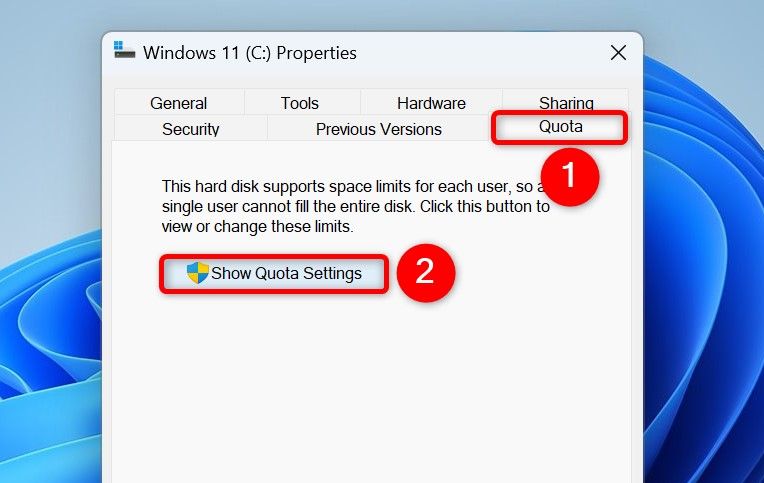
To apply a unique disk quota limit to specific users, launch File Explorer (press Windows+E), right-click your drive, and choose “Properties.” Open the “Quota” tab and select “Show Quota Settings.”
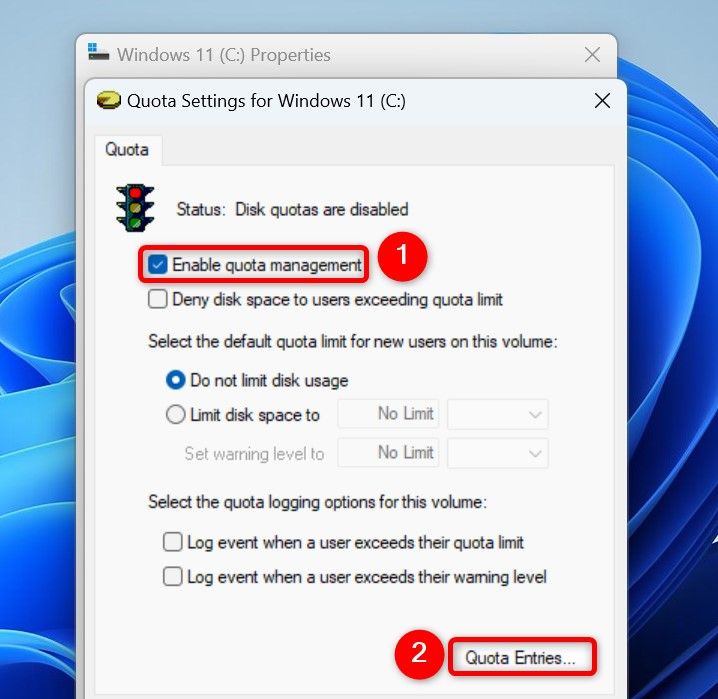
Turn on “Enable Quota Management” and click “Quota Entries.”
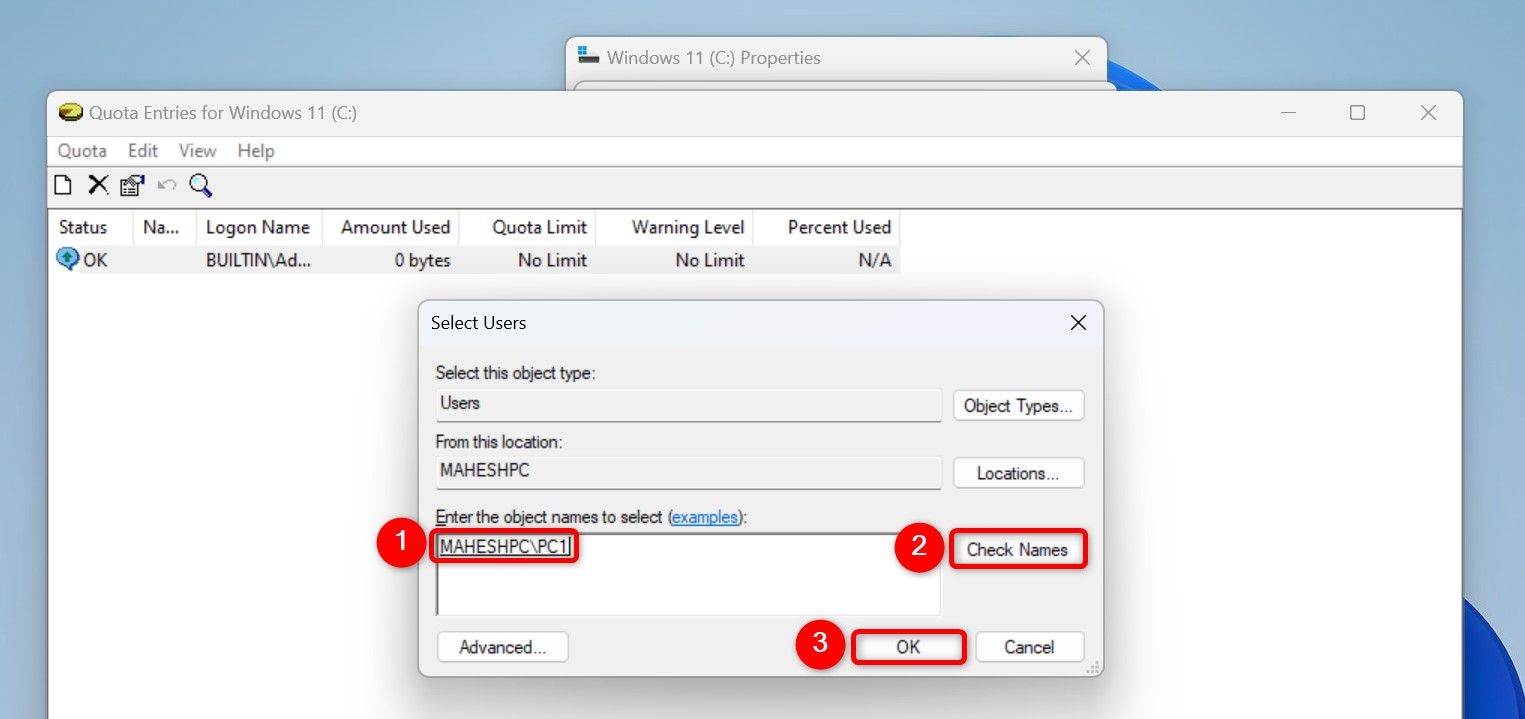
In the Quota Entries for [Drive Name] window, from the menu bar, choose Quota > New Quota Entry. On the open window, click the “Enter the Object Names to Select” field, type the username of the user you want to specify quota, click “Check Names,” and choose “OK.”
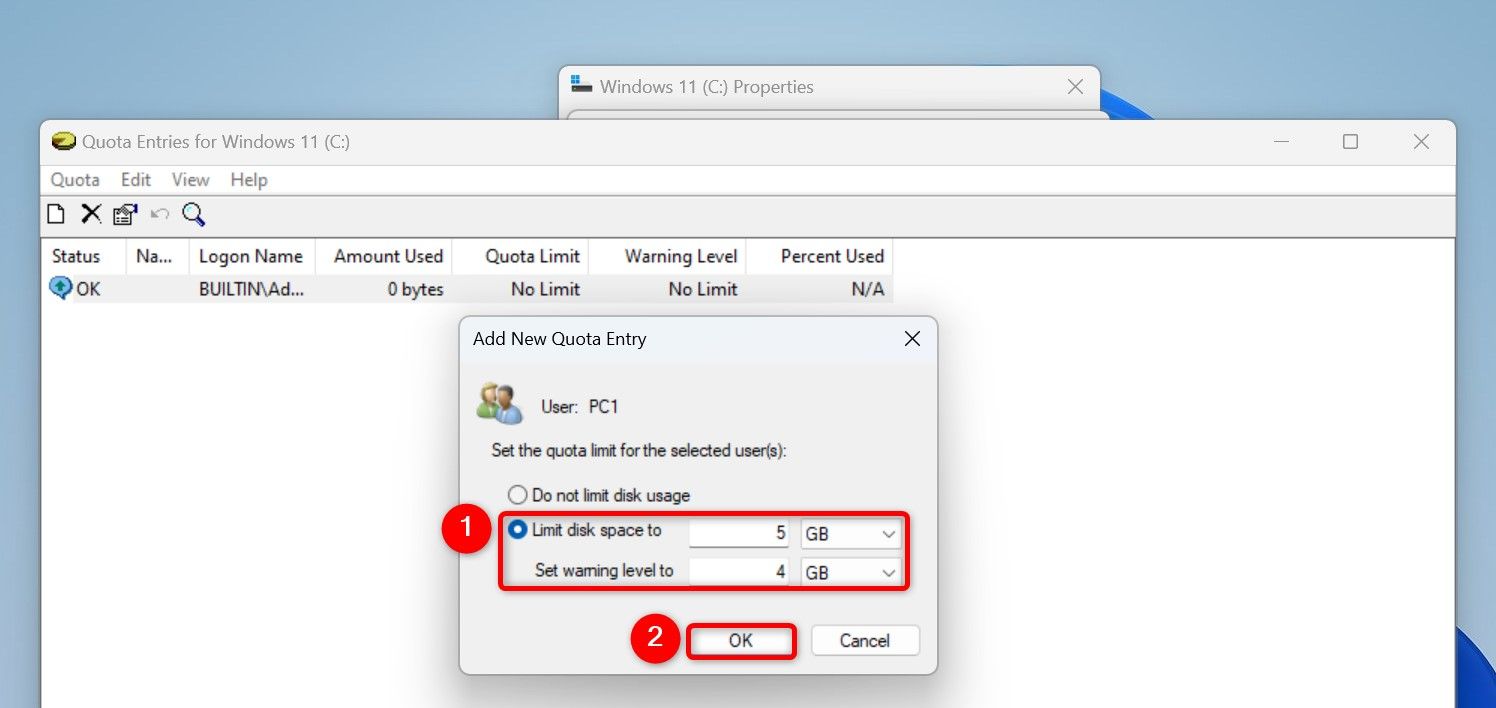
Turn on “Limit Disk Space To” and type the quota in the text field. Choose the appropriate unit from the drop-down menu. Select the “Set Warning Level To” field and type the quote the user reaches to get a notification. Select the appropriate unit from the drop-down menu.
Then, click “OK.”
Repeat the above steps for each user you want to assign unique quotas.
Monitor the Disk Usage
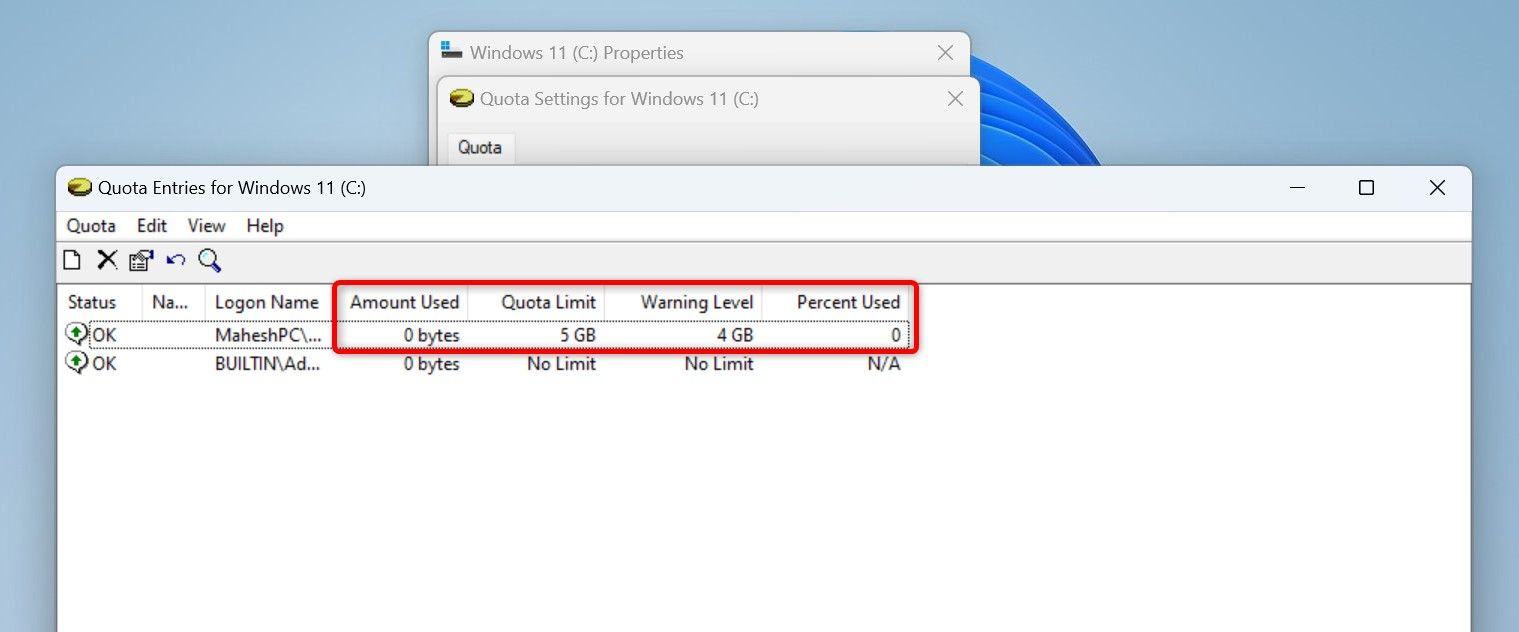
After turning on disk quotas, you can monitor disk usage to see which user is using what storage space. To do that, open File Explorer, right-click your drive, and select “Properties.” Open the “Quota” tab and click Show Quota Settings > Quota Entries.
On the open window, next to users’ usernames, you’ll see their disk usage. Here’s what each column means:
- Amount Used: This column tells you the storage amount used by the specific user.
- Quota Limit: This is the limit you set for this user.
- Warning Level: This is the storage this user will reach to get a notification for disk quotas.
- Percent Used: This is the quota used by this user in percentage.
To change the amount of space allocated to a user, right-click that user on the list and choose “Properties.” On the open window, tweak the quota options and select “Apply” followed by “OK.”
Disable Disk Quotas
If you want to turn off disk quotas for all or specific users, launch File Explorer (press Windows+E), right-click your drive, select “Properties,” and choose Quota > Show Quota Settings.
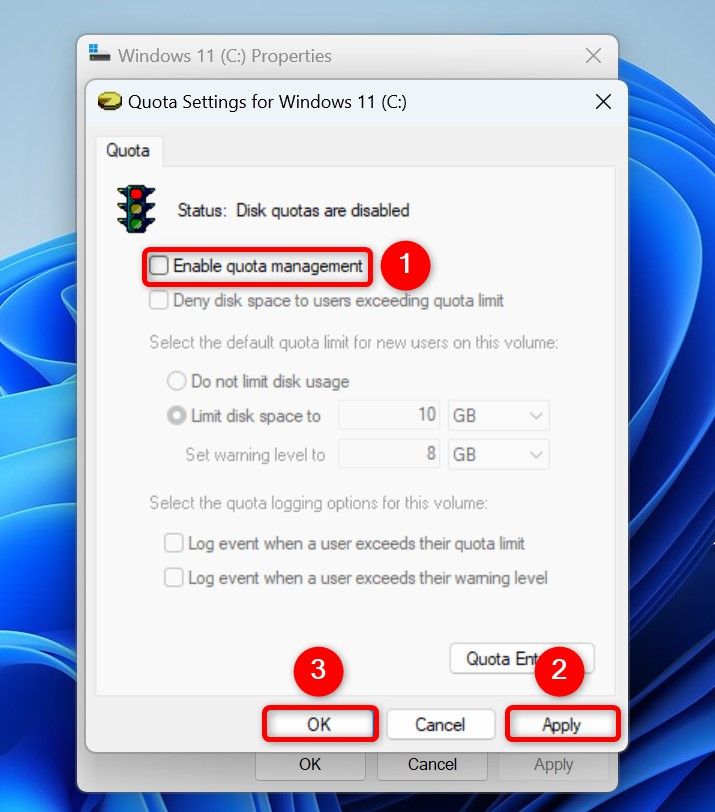
To disable disk quotas entirely, disable the “Enable Quota Management” option. Then, click “Apply” followed by “OK.”
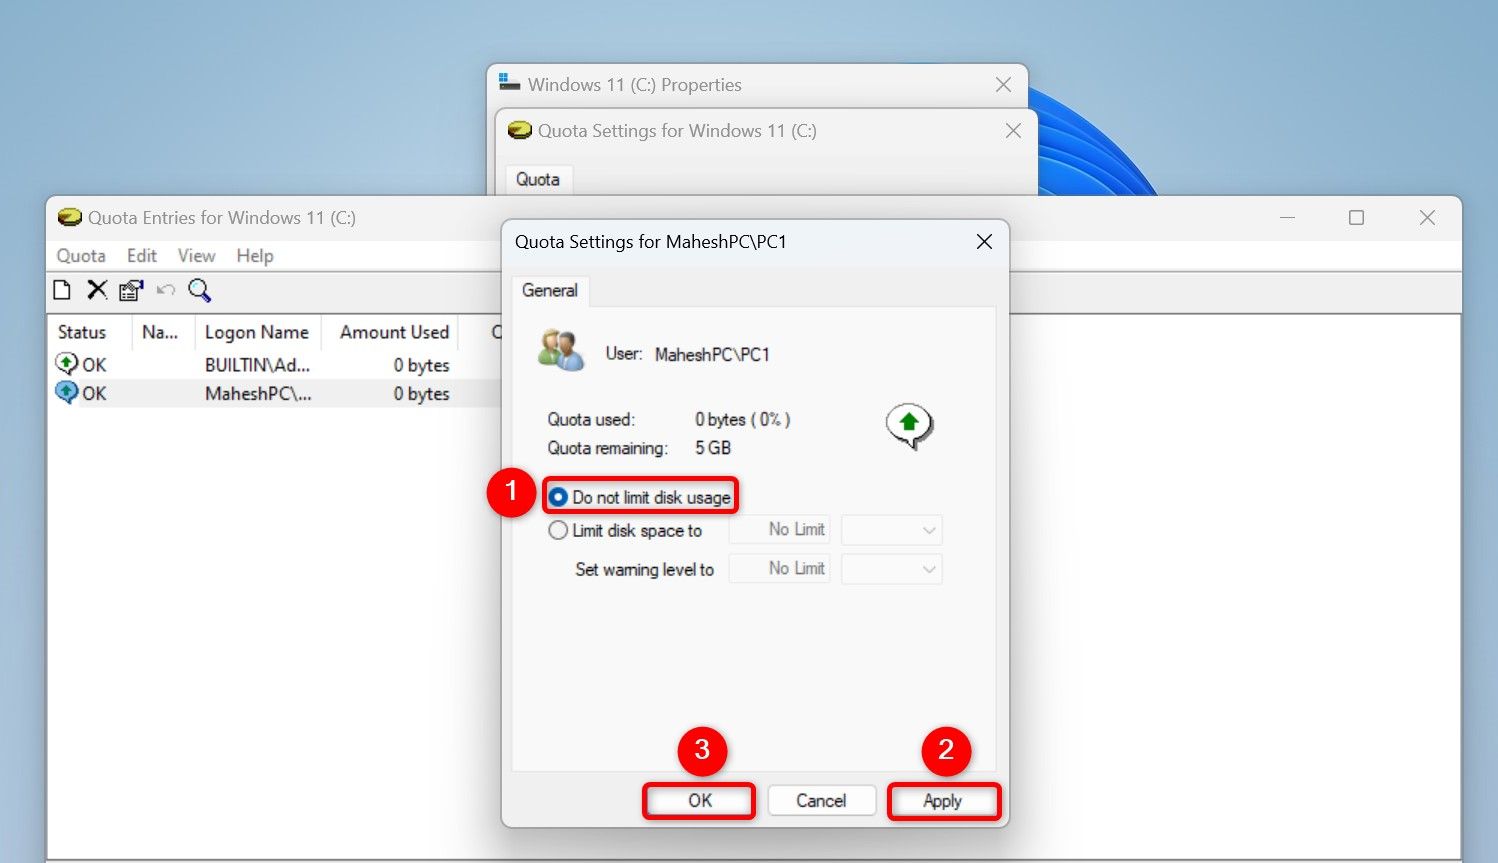
To disable disk quotas for specific users, ensure the “Enable Quota Management” option is still enabled. Then, click the “Quota Entries” button. Find and right-click the user you want to disable quotas for and choose “Properties.” On the open window, enable the “Do Not Limit Disk Usage” option, then click “Apply” followed by “OK.”
Another way to disable quotas for a specific user is by right-clicking their username on the Quota Entries for [Drive Name] window and choosing Delete > Yes. This then applies the generic quota to all users, if you have set one.
Troubleshooting Issues With Disk Quotas
If you’ve run into problems enabling or using the disk quota feature, the following tips will help you fix the problem.
If You Don’t See the “Quota” Option
If you don’t find the “Quota” option on a drive’s Properties window, that means your drive isn’t using the NTFS file system. Your drive might be using FAT32 or exFAT file system.
You can change your drive’s file system to NTFS with or without formatting the drive. To change the file system without deleting the drive’s data, open Windows Search, type Command Prompt, select “Run as Administrator,” choose “Yes” in the prompt, type the following command replacing “A” with your drive’s letter, and press Enter.
convert A: /fs:ntfs
If Users Are Still Exceeding the Allowed Quota
If your users are storing more data than they’re allowed, you have not enforced disk quotas strictly. To make the feature strict, enable the “Deny Disk Space to Users Exceeding Quota Limit” option. This way, the system won’t let users more data if they’ve exceeded their limit.
And that’s how you better manage the storage space on your Windows 11 computer. Other ways to free up disk space include getting rid of old files and even clearing the cache.
