Key Takeaways
- Easily find out who is connected to your router’s Wi-Fi network by accessing the web interface through a browser and looking for options like “Connected Devices” or “Attached Devices.”
- Use GlassWire Pro to get a comprehensive view of all connected devices on your Wi-Fi network, along with other useful features like bandwidth usage graphs and alerts for new device connections.
- If your router doesn’t have a web interface with a device list, you can use scanning tools like NirSoft’s Wireless Network Watcher to get details on devices.
Do you know who’s connected to your router’s Wi-Fi network? Take a look at the list of devices connected to your Wi-Fi network from your router or computer to find out.
Bear in mind that many devices connect to your Wi-Fi these days. The list will contain laptops, smartphones, tablets, smart TVs, set-top boxes, game consoles, Wi-Fi printers, and more.
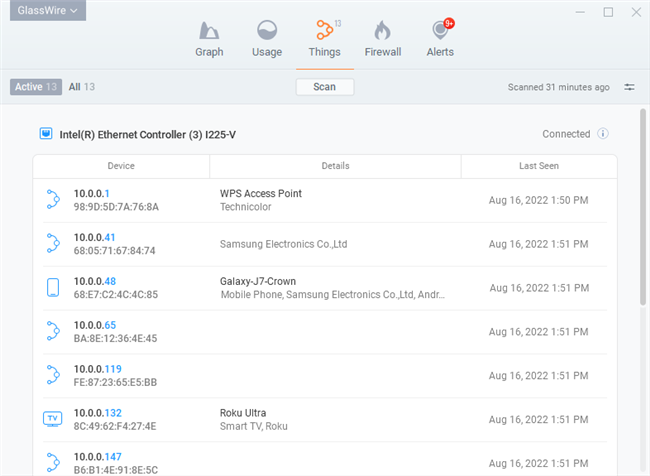
Use GlassWire Pro to See Who Is Connected (And Get Alerts)
We’re big fans of the GlassWire firewall and security system, and one of the great features they have in the Pro version is a quick and easy Network view that shows you all the devices connected to your Wi-Fi network.
GlassWire isn’t just a firewall, it also has beautiful graphs to show your bandwidth usage, see what applications are connecting to what, and exactly how much bandwidth each application is using. You can get alerts when an application changes something, or when an installer tries to install a new system driver. There are tons of features, too many to list here.
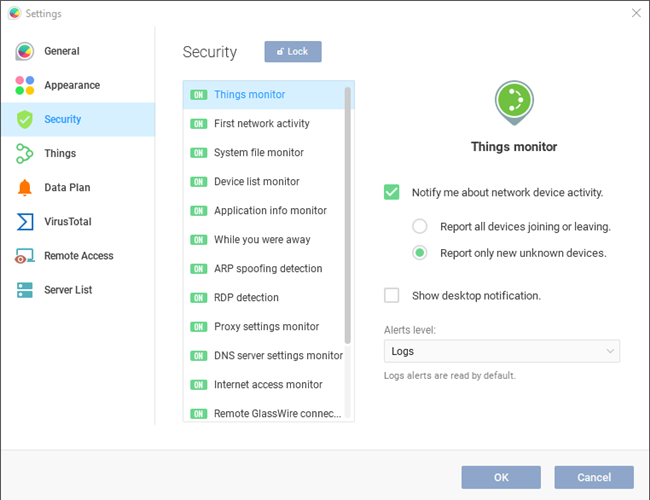
But what makes GlassWire even better for today’s topic is that if you go into the Settings panel, you can actually enable alerts whenever a new device tries to connect to your Wi-Fi. Now that’s a great feature!
GlassWire is free for basic use, but the network device monitoring is only included in the paid versions ($39 for one PC).
Try Your Router’s Mobile App
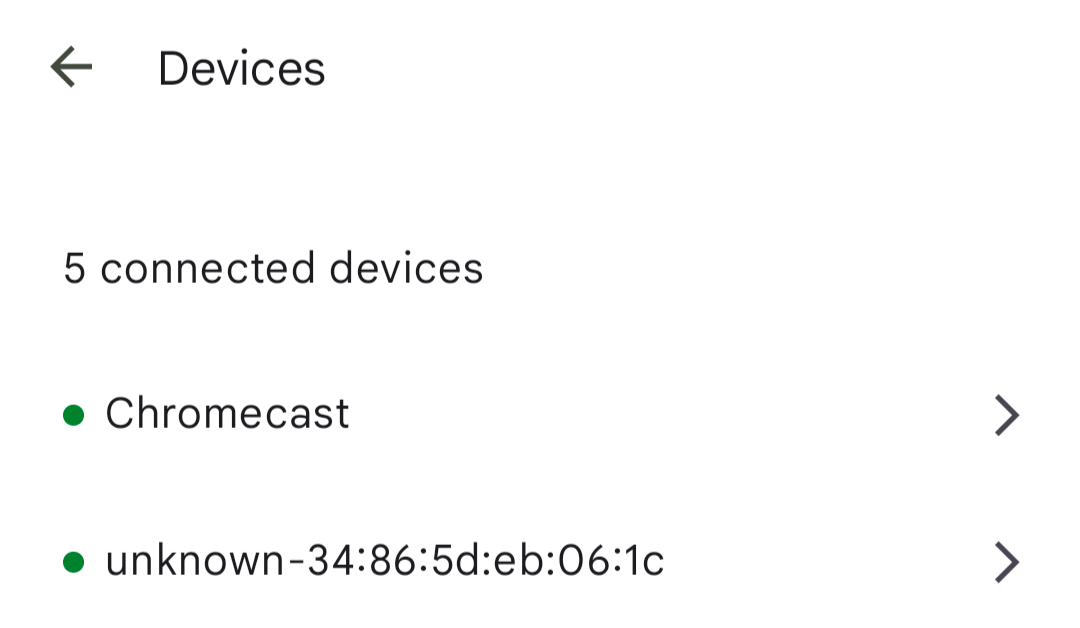
Many modern routers come with companion apps for your phone that include a list of connected devices as well. In fact, a few even require to use the app to perform the setup procedure. So you may already have it installed. Just search for your router manufacturer’s app on the Play Store or App Store, and once you’ve installed and logged into it, look for a list of connected Wi-Fi devices.
For example, below is what the Google Fiber app shows when you go to the “Manage Devices” section of its app.
Use Your Router’s Web Interface
Still, the best way to find this information will be to check your router’s web interface. Your router hosts your Wi-Fi network, so it has the most accurate data about which devices are connected to it. Most of the best routers offer a way to view a list of connected devices, although some may not.
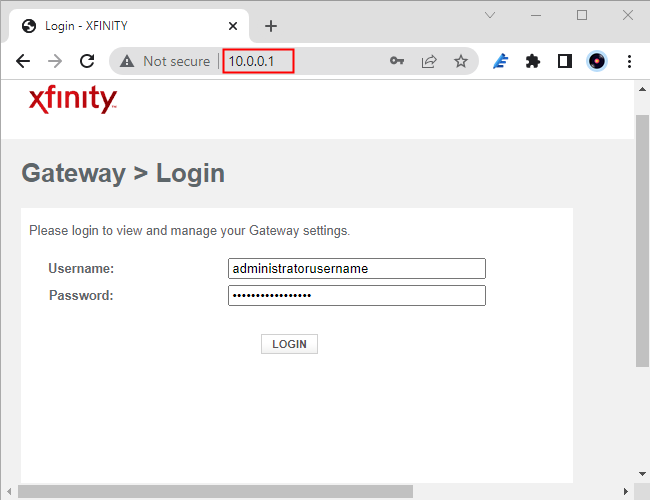
The standard tips for accessing your router’s web interface apply. If you’re not sure of its IP address, you can generally look for your computer’s gateway IP address via the Control Panel. You could also run the ipconfig /all command in a Command Prompt window.
Next, plug this IP address into your web browser’s address bar and press Enter. This should usually bring up your router’s interface. If it doesn’t, check your router’s documentation — or perform a web search for its model number and “web interface” to find out how to access it. If you haven’t set a custom password and passphrase, you may need to perform a search or check the documentation to find the default ones for your model of router.
Finding the List of Connected Devices
You’ll now need to look for the option in your router’s web interface somewhere. Look for a link or button named something like “attached devices,” “connected devices,” or “DHCP clients.” You may find this on the Wi-Fi configuration page, or you may find it on some sort of status page. On some routers, the list of connected devices may be printed on a main status page to save you some clicks.
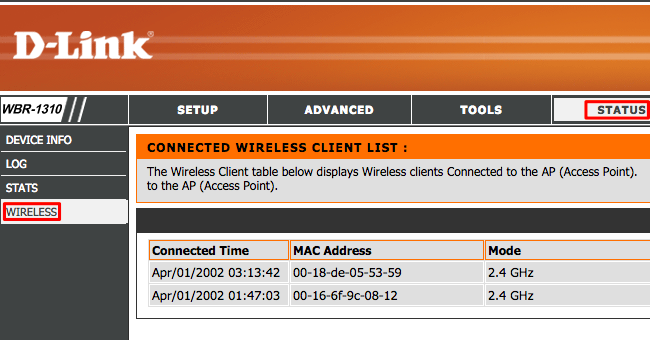
On many D-Link routers, a list of connected devices is available under Status > Wireless.
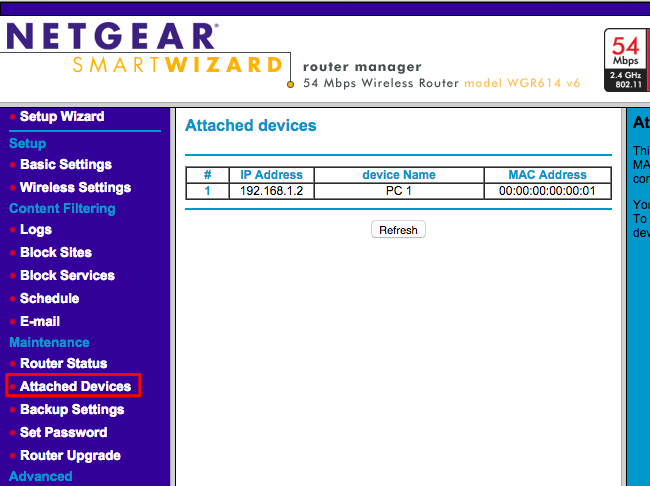
On many Netgear routers, you’ll find the list under “Attached Devices” in the sidebar.
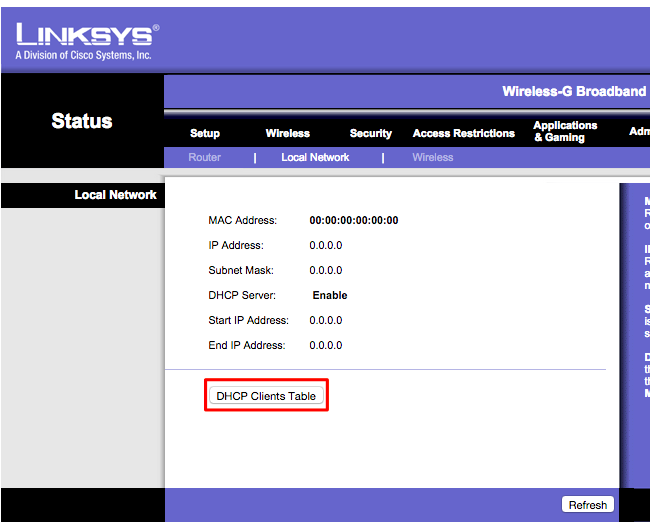
On many Linksys routers, you’ll find this option under Status > Local Network > DHCP Clients Table.
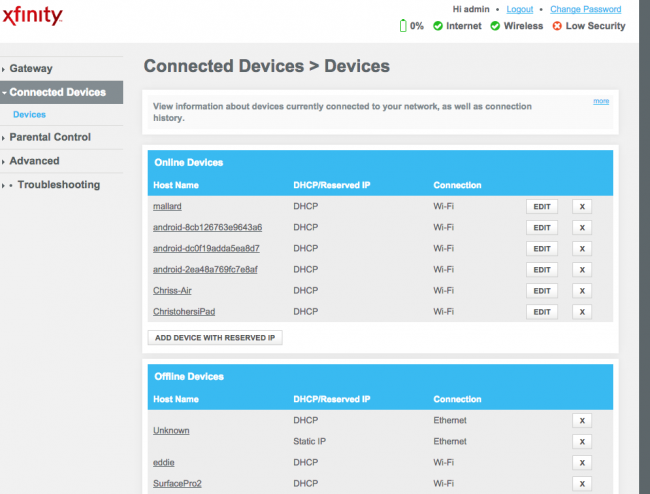
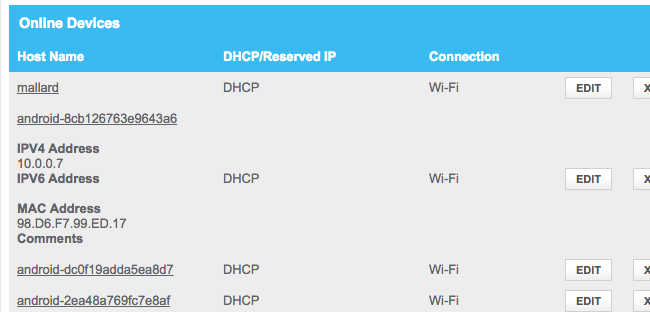
On Comcast Xfinity routers, you’ll find the list under Connected Devices in the sidebar.
Understanding the List
Many routers simply provide a list of devices connected via DHCP. This means that, if a device is configured with a static IP configuration, it won’t appear in the list. Keep that in mind!
When you get the list open, you’ll generally see similar information on every router. The interface probably shows you a table with a list of connected devices, their “host names” on the network, and their MAC addresses.
If the list doesn’t offer meaningful enough names, you may want to change the hostnames (also known as “computer names” or “device names”) on your computer or device’s operating systems. The host name will be visible here. Unfortunately, there’s no way to change the hostname on some devices — for example, we’re not aware of a way to change an Android device’s hostname to a more meaningful one without rooting it.
When in doubt, you could always compare the MAC address seen on this page (or the IP address displayed) to the MAC address of a device you’re using to check which device is which.
This List Isn’t Foolproof
Of course, this list isn’t completely perfect. Anyone can set any hostname they want, and it’s also possible to change your MAC address to spoof other devices. However, this would mean that a device of yours wouldn’t be able to connect to the network while another device with a spoofed MAC address was taking its place, as routers generally block two devices with the same MAC address from connecting at the same time. And someone who gained access to your router could set up a static IP configuration to be stealthy.
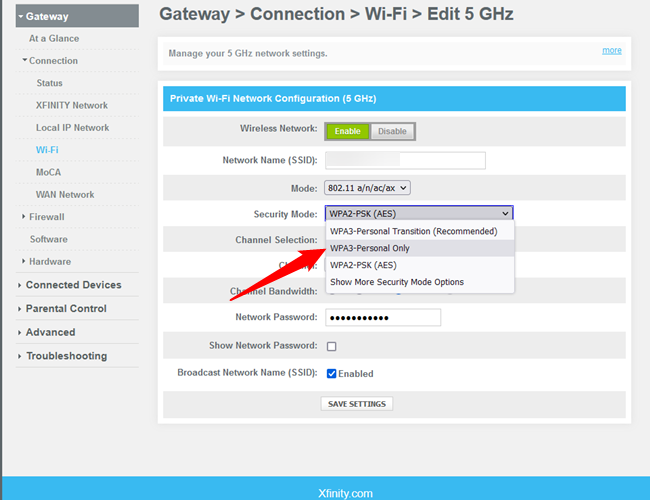
Ultimately, this isn’t the most powerful security feature, or a foolproof way to notice people connected to your network. It’s not something you need to check regularly. If there are devices you don’t recognize, you can change your Wi-Fi passphrase — you’re hopefully using WPA3 encryption — and that will kick all the devices off until they can provide the new passphrase.
However, even devices you don’t recognize may be something you own that you didn’t remember. For example, an unknown device could be a Wi-Fi-enabled printer, a Wi-Fi connected speaker system, or your smart TV’s built-in Wi-Fi that you never use.
Scan Your Wi-Fi Network With Software On Your Computer
The ideal way to check for connected devices will generally be to use your router’s web interface. However, some routers may not offer this feature, so you may want to try a scanning tool instead. This is a piece of software running on your computer that will scan the Wi-Fi network you’re connected to for active devices and list them. Unlike router web interface tools, such scanning tools have no way of listing devices that have been connected, but which are currently offline. You’ll only see online devices.
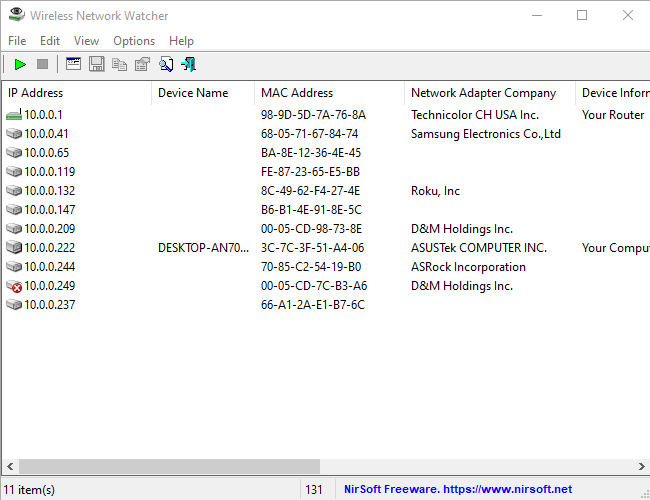
There are a lot of tools for doing this, but we like NirSoft’s Wireless Network Watcher. Like other NirSoft software, it’s a convenient little tool without any adware or nag screens. It also doesn’t even need to be installed on your computer. Download the tool, launch it, and it will watch your Wi-Fi network for active devices, displaying their device names, MAC addresses, and the manufacturer of their Wi-FI network hardware. The manufacturer name is very helpful for identifying specific devices without device name — especially Android devices.
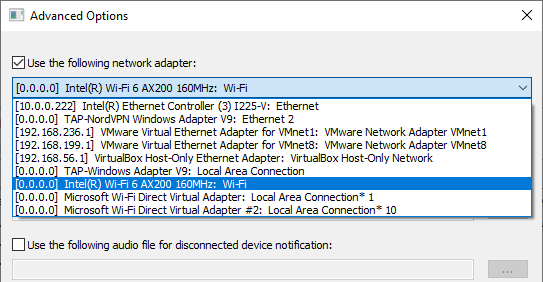
This tool may not work properly until you specify your Wi-Fi network adapter. On our Windows PC, we had to click Options > Advanced Options in Wireless Network Watcher, check “Use the following network adapter,” and choose our physical Wi-Fi adapter before performing a scan.
Once again, this isn’t something you really need to worry about constantly. If you’re using WPA2-PSK encryption, or better yet, WPA3, and have a good passphrase, you can feel fairly secure. It’s unlikely anyone is connected to your Wi-Fi without your permission. If you’re concerned this is happening for some reason, you can always just change your Wi-Fi’s passphrase — you’ll have to re-enter it on all your approved devices, of course. Be sure WPS is disabled before you do this, as WPS is vulnerable and attackers could potentially use it to re-connect to your network without the passphrase.
Changing your Wi-FI passphrase can also be a good idea if you’ve given out your Wi-FI password—to neighbors visiting you, for example—and want to be sure they don’t continue using it for years.

