Email templates are great for ensuring consistency, saving time, and avoiding typos. However, as Microsoft transitioned from the classic Outlook to the new Outlook, the process for creating, using, and editing templates changed significantly.
Here’s the method that works the best for me.
How to Create Your Template
First, click “New Email” in the Home tab on the ribbon.
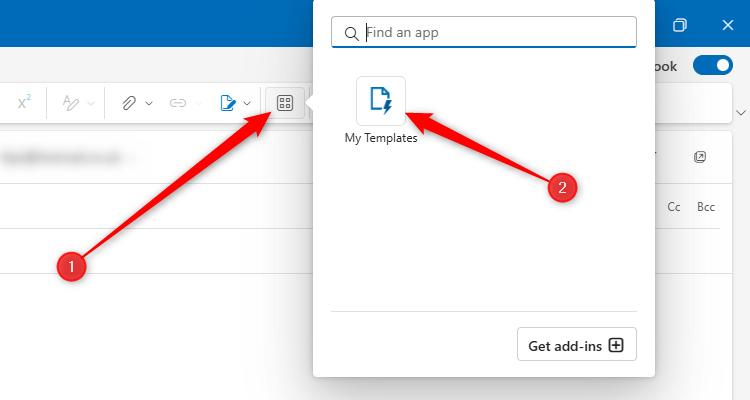
Next, click the Apps icon in the Message tab on the ribbon, and choose “My Templates.”
When I first tried this method, My Templates appeared as a default add-in. However, if you can’t see My Templates on this menu, type
My Templates
in the Find An App search bar. If this doesn’t work, click “Get Add-ins,” and search for it there instead.
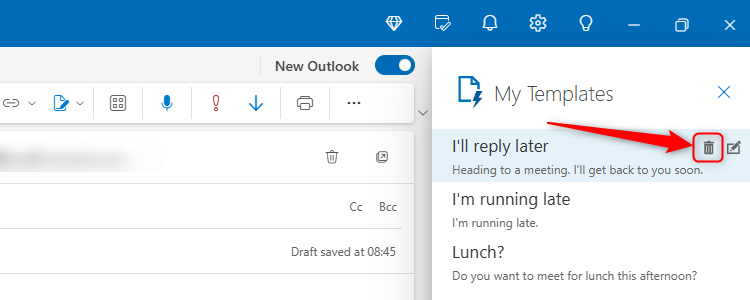
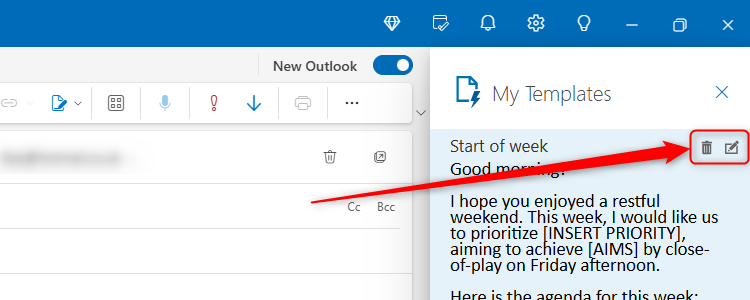
You will see some predefined templates already sitting in the My Templates pane, which you can remove by clicking the trash icon that appears when you hover over them with your cursor. This will keep your My Templates pane nice and tidy, and make it easier for you to manage your own templates after you’ve created them.
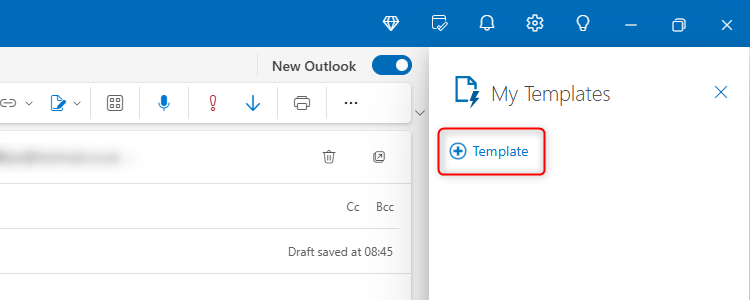
You’re now ready to add your own templates. To do this, click “Template.”
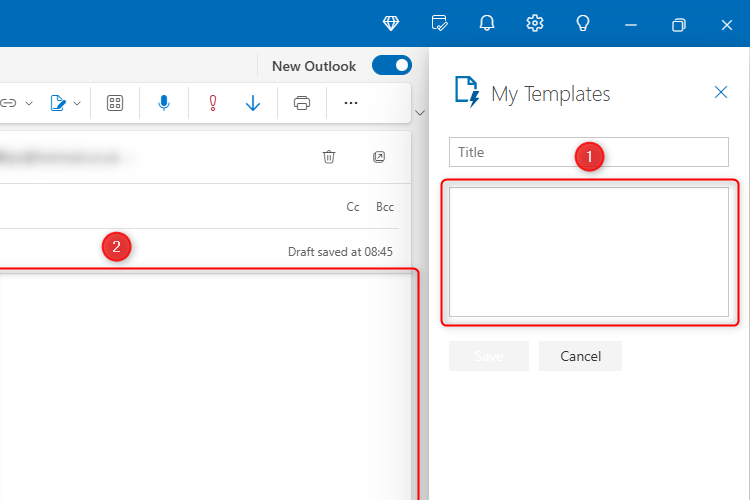
You now have two options—you can either draft your template directly in the My Templates pane or use the Message pane:
- If you want to quickly draft an email or a section of an email with no formatting—and perhaps add formatting later when you actually want to use the template—this is where the My Templates pane comes in handy.
- On the other hand, if you want your template to be fully formatted and ready to use, use the Message pane.
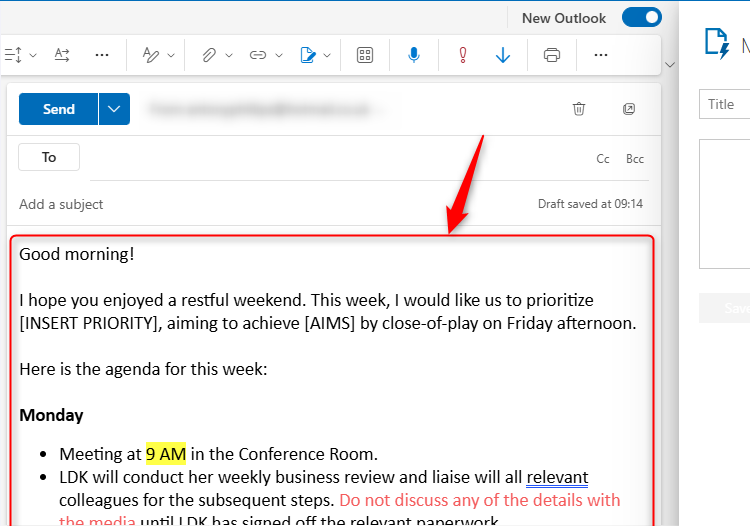
From this point, I’ll assume you’re applying your formatting now, meaning you’re using the Message pane (labeled “2” in the screenshot above) to create your template. You don’t need to close the My Templates pane—we’re going to come back to this shortly, so leave it open for now.
Compose the message (or message segment) as you would like it to appear when you finally use it down the line, including using square brackets to indicate things that will change each time you use the template. You can use any of the formatting tools in the Message tab on the ribbon (or use the new Outlook keyboard shortcuts), including bullet-pointed lists, line spacing, indentations, strikethrough, text color, and font size. You can also use Ctrl+K to add a URL link to selected text, or add company branding via the “Pictures” button on the Insert tab.
Unfortunately, at the time of writing this article (November 2024), you can’t add attachments—you’ll need to do this manually in the Message pane when you use the template in the future.
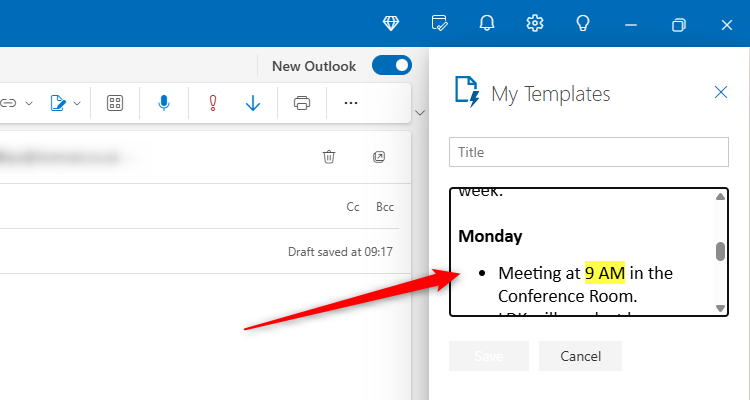
After you’ve carefully proofread and edited your email using Microsoft Editor, select (Ctrl+A) and cut (Ctrl+X) the message content, and paste (Ctrl+V) it into the My Templates message body field. You will see that all your formatting has been retained during this transition.
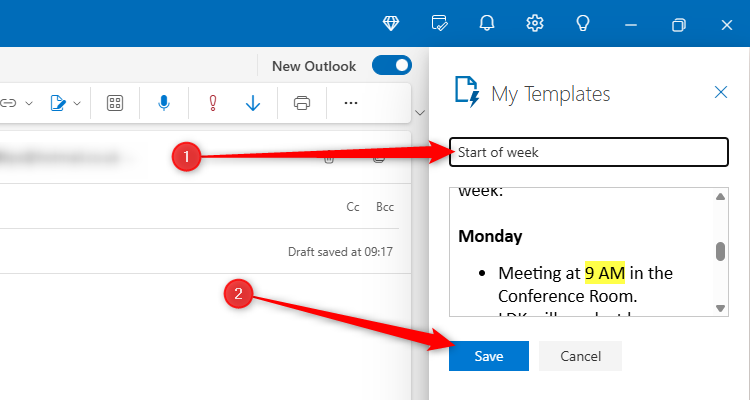
Give your template a name and click “Save”.
Don’t confuse the message name with the message subject. When you name your message in the My Templates pane, you are simply adding a label so that you can identify the message among the templates. This will not translate into the email subject when you use the template. As an alternative, you could insert the subject into the first line of the template for cutting and pasting later on.
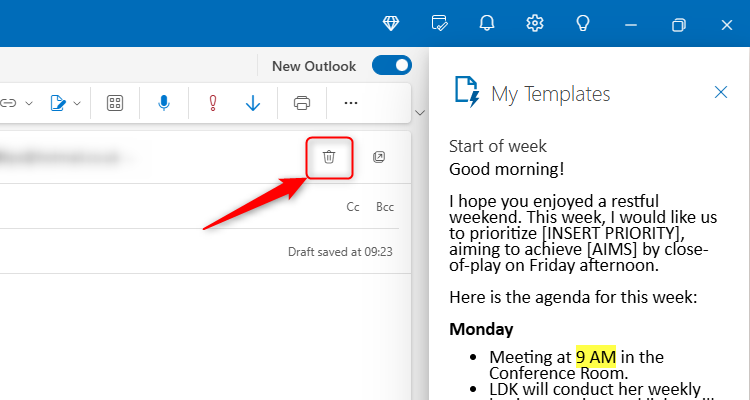
Finally, because you’ve now saved the message in My Templates, you can click the trash icon in the Message pane to discard the draft.
How to Use Your Template
Click “New Email” in the Home tab on the ribbon.
Now, in the Message tab on the ribbon, click the Apps icon, and choose “My Templates.”
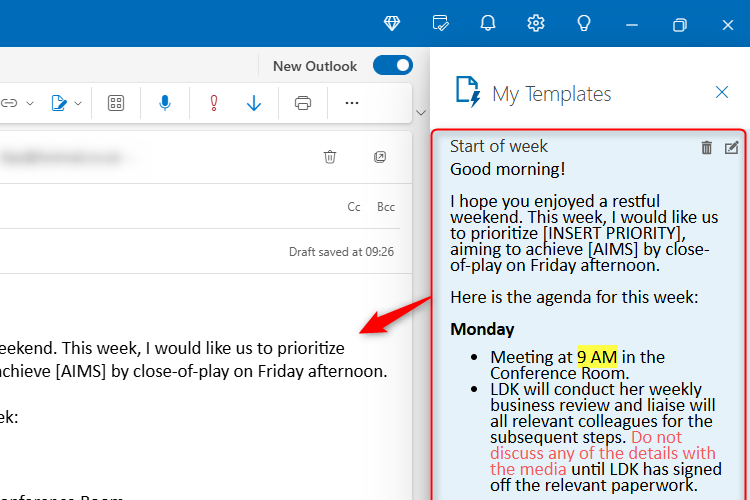
Locate the template you want to use, and click it once to transfer it to the Message pane. If you already have text in your email in the Message pane, the template will be inserted wherever your cursor is currently placed.
Double-check whether you need to make any content or formatting changes, and attach any documents if necessary.
If you change your mind and want to use a different template, select (Ctrl+A) and delete the existing text from the Message pane, before single-clicking the template you want to use instead. Alternatively, if you want to use two templates in one email, don’t delete the existing text—clicking each template will insert it where your cursor is placed, even if there is already text within the email body.
How to Edit or Delete Your Template
Whenever you need to access the My Templates pane, you first need to click “New Email” in the Home tab on the ribbon. This then adds the Message tab to the ribbon, which you’ll need to click to locate “My Templates” via the Apps icon.
Then, with the My Templates pane open, hover over the relevant template, and click either the trash icon or the edit icon.
If you opted to edit the template, click “Save” when you’ve finished.
The new Outlook has had mixed reviews since its launch in several phases over the course of 2022 to 2024. While some people have identified features that suggest it’s an improvement on its predecessor, others feel that it’s simply not worth using.


