The Rust programming language is unique compared to other languages. It’s also extremely easy to build powerful applications with just a few lines of code. Here, I’ll demonstrate how easy it is to build an application in Rust by showing you how to build a simple recipe manager.
Setting Up Rust
Before we can use Rust, we have to install it on our system. luckily, we can do that in just a few steps:
As someone who is more used to using Visual Studio, I found that using VS Code for Rust is far more efficient. The Rust interpreter for VS Code is updated far more often. The actual process of setup is much more detailed, but I won’t spend too much time on it here, since the guide mentioned do a good job of giving you a step-by-step way to get Rust on your system.
Defining Our Program Requirements
In keeping with standard program development cycle standards, we should define what our program needs to do before we start coding it. This gives us an overview of what we need to include in it. As such, here are the basic functionalities we need from our program:
- Add new recipes
- View all recipes
- View a specific recipe
- Edit existing recipes
- Delete recipes
- Save recipes to a file
- Load recipes from a file
This seems like a simple enough setup for this program, and it shouldn’t be too complicated to write it. Let’s dive right in!
Setting Up Our Folder and Files
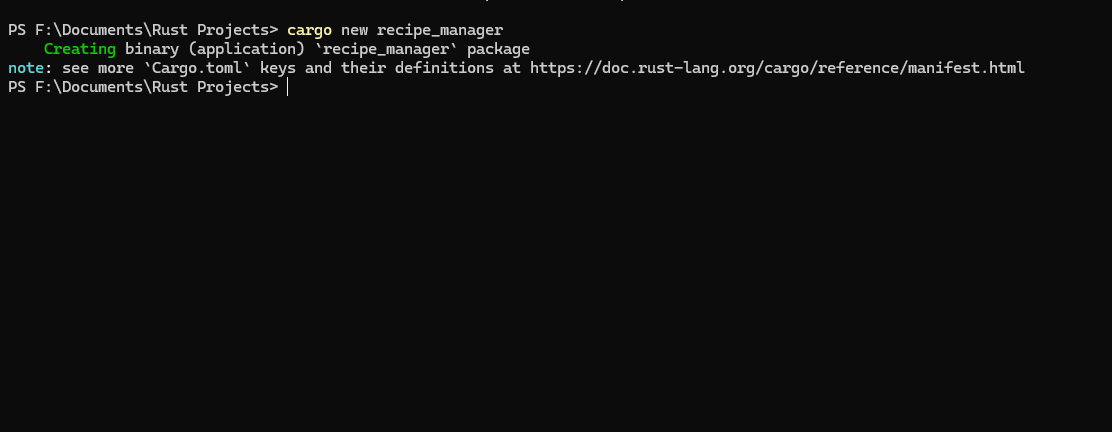
The first thing we need to do is to set up a folder for our project and open it in a terminal window. This may differ by operating system, but most of them allow us to right-click on a folder and “Open in Terminal.” Once we do that, we should enter the command:
cargo new recipe_manager This creates a new package with all the dependencies we need to code in Rust. Once we complete the cargo command, the terminal window should look like this:
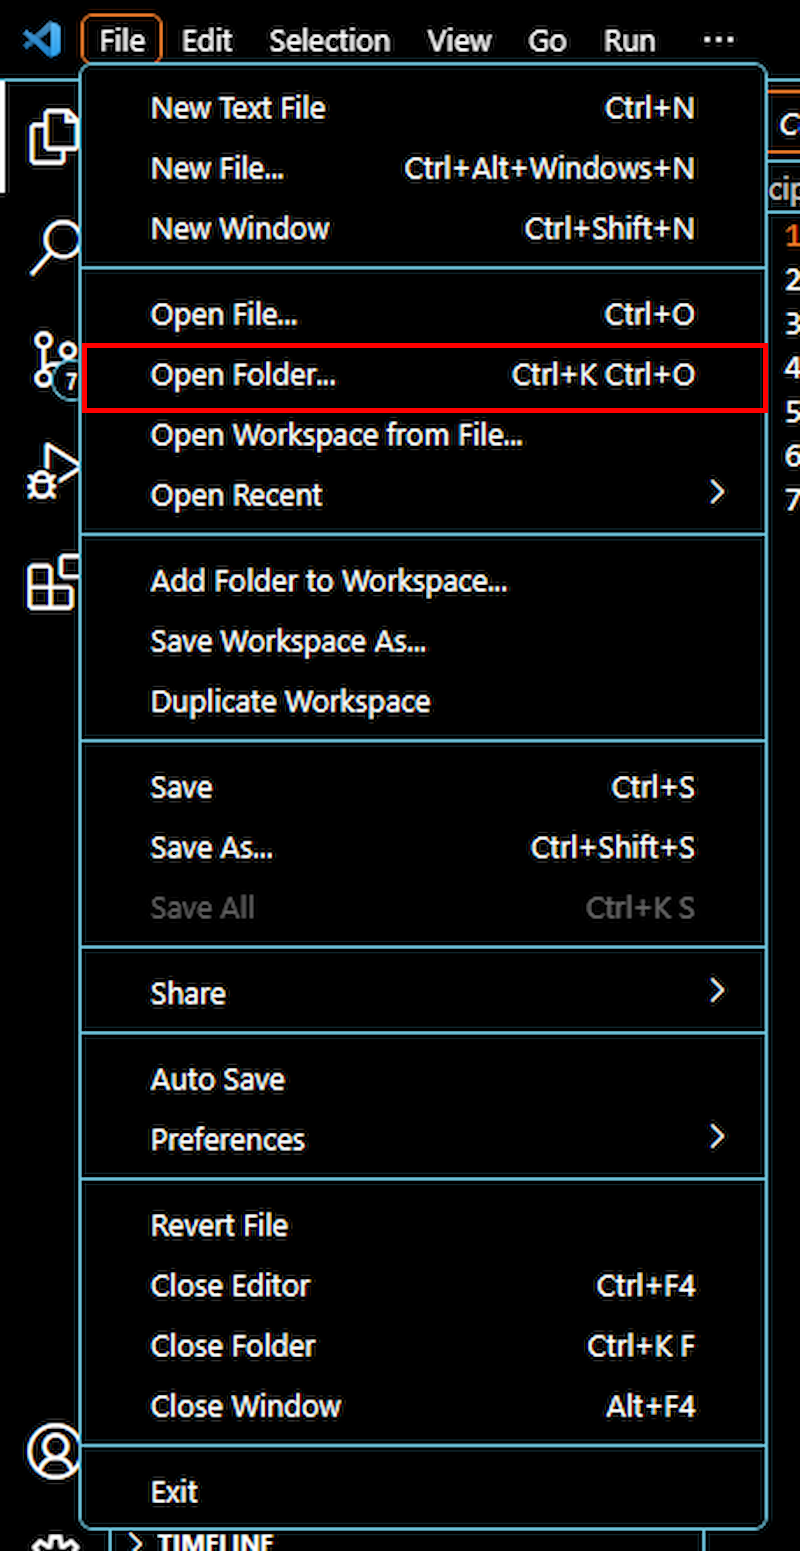
The next thing we need to do is open our folder in VS Code. This is as simple as opening VS Code and hitting the “File” command and navigating to “Open Folder”:
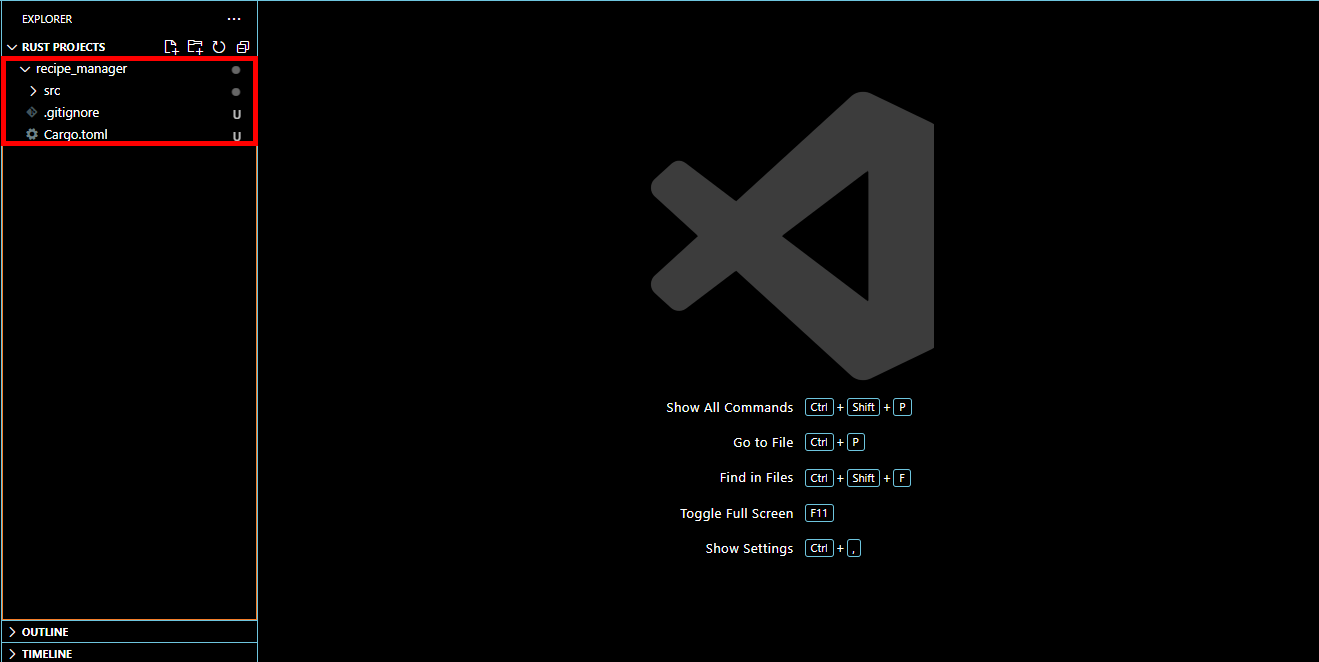
This will give us a project window that looks a little bit like this:
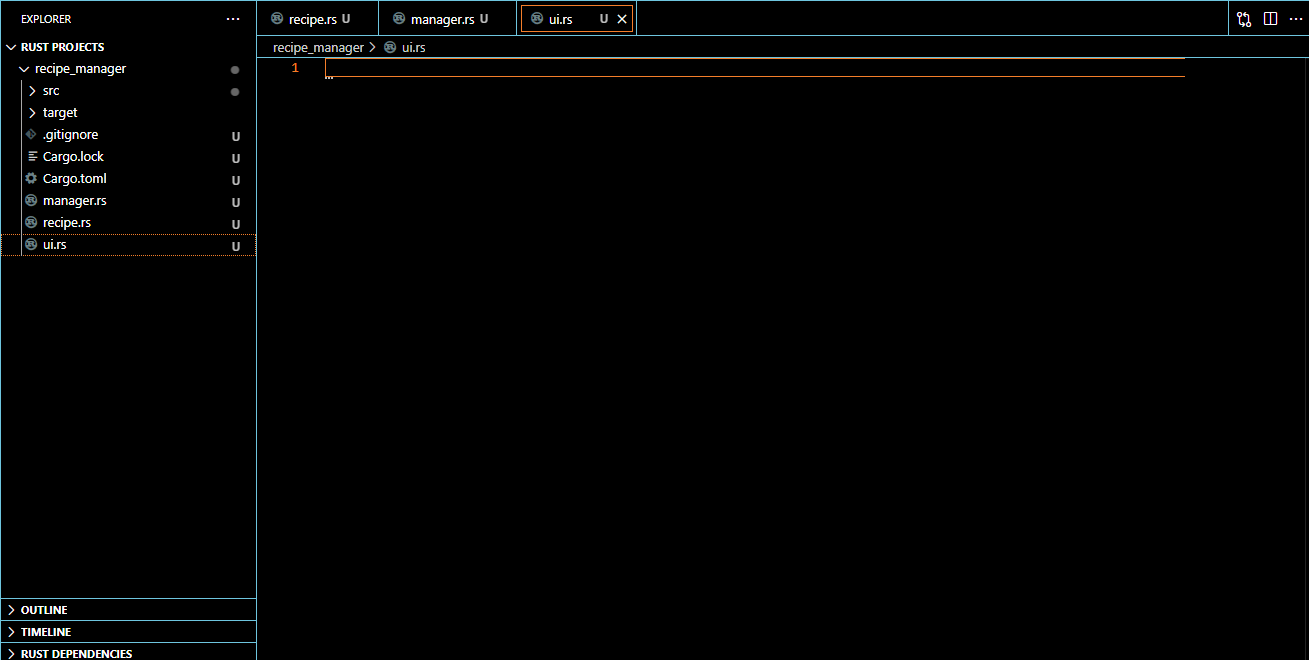
Once we’ve set up our folder, we will need to create a few files that will do the heavy lifting for our project. Since we want the UI, the app manager, and the recipe definition in different files, we’ll create three files that will hold the code for those elements separately. We can do this by hitting the “File” menu again and selecting “New File.” We’ll rename those files to recipe.rs, manager.rs, and ui.rs. When we’re done, our project window should look something like this:
We’re not done with setup yet. The next thing we’ll have to do is edit the cargo.toml file in our folder that’s automatically created when cargo built the folder initially. We’re going to be implementing a simple UI system for our application (to make it look a little more esthetically pleasing). For this, we’ll need to change some dependencies. Our cargo.toml file should now look like this:
[package]
name = "recipe_manager"
version = "0.1.0"
edition = "2021"[dependencies]
serde = { version = "1.0", features = ["derive"] }
serde_json = "1.0"
iced = "0.8"
There are three dependencies in our project, but two of them are related. Serde is a method of serializing data, and since our recipes will be a unique data type, we’ll need serde to save and load them. Iced is a simple GUI manager that works across several operating systems. We’re using it since it’s easy to implement, and it’ll work with almost any OS. Now that we’re done with setup, we can get to the real fun: coding our application.
Creating the Recipe Script
The first thing we’ll need to build is the recipe script which will store our data. In VS Code, navigate to the recipe.rs file and open it. The file should show up as blank on the left pane. From there, we’ll write this code:
use serde::{Serialize, Deserialize};
pub struct Recipe {
pub id: u32,
pub name: String,
pub ingredients: Vec<String>,
pub instructions: Vec<String>,
pub servings: u32,
}
impl Recipe {
pub fn new(id: u32, name: String, ingredients: Vec<String>, instructions: Vec<String>, servings: u32) -> Self {
Recipe {
id,
name,
ingredients,
instructions,
servings,
}
}
}
This code allows us to create a public structure for our recipes, which includes variables to store the serving amount, instructions, ingredients, name, and a unique ID to refer to. We also have a constructor function to help us create new instances of recipes once we get the information to put into the variables. Now that we have a recipe structure, we can start creating the application manager.
Building the Application Manager
The recipe structure allows us to save our recipes, but we need something that will deal with the actual saving, loading, and updating of recipes. When we built an expense tracker in Python, we implemented saving and loading, but in Rust, this process is a little different. Here’s what our application manager (stored in manager.rs in our project folder) should look like:
We’ll first start by importing our recipe structure we coded earlier and the fs library to deal with file input and output (file reading and saving). Right under that, we’ll define our recipe manager, and the instance. We can thing of the recipe manager as a container that holds all our recipes and keeps them organized.
After that is the add_recipe function which:
- Takes recipe details as parameters.
- Creates a new
Recipewith the currentnext_id. - Adds the recipe to the
recipesvector. - Increments
next_idfor the next recipe. - Returns the ID of the newly added recipe.
The get_all_recipes function returns a reference to the entire recipe list. The get_recipe function searches the list of recipes and returns one based on the ID it takes as input. The update_recipe function searches for a recipe and allows us to update the details of that recipe and saves the new copy. The delete_recipe function drops the recipe from the list.
In addition to these functions, we have file operation functions to save and load the list of recipes. This gives us a decent basis for our program, but let’s make it a little prettier.
Implementing the GUI
A basic command-line UI could work for this program, but it’s going to be a very boring interface. Let’s spice it up by writing some code for our ui.rs file:
Once we import iced into our file, we can design the UI for it. UI leads to a different user experience, and while they’re two separate things, they are related. The code inside our UI file will create a pleasant-looking experience for our users and encourage them to use our program for their recipe storage. It also makes life easier for us since navigating a UI is a hundred times easier than a terminal window. Each application is different so experimenting with the UI layout is something you should do until you find one that you like. This layout works for me, so we’ll move on to seeing if our code runs.
Setting Up main.rs and Running Our Code
Inside the “src” folder in our main recipe_manager folder, we have a main.rs file. we’re going to overwrite the existing code with this:
mod recipe;
mod manager;
mod ui;fn main() -> iced::Result {
    gui::run()
}
Our interpreter will immediately start complaining that it can’t find recipe, manager, or ui, but there’s an easy fix for that. Simply select all those files from the main folder and drag and drop them into the src folder. The main.rs file won’t see any files that are outside its own folder, so this is an easy fix for that problem. Once that problem is solves, we can attempt to run our code and see if it works.
Open your project folder in a terminal and type:
cargo run
You should see Rust building your project. If you encounter any errors, ensure that your Rust is up-to-date by opening a terminal window and typing:
rustup update
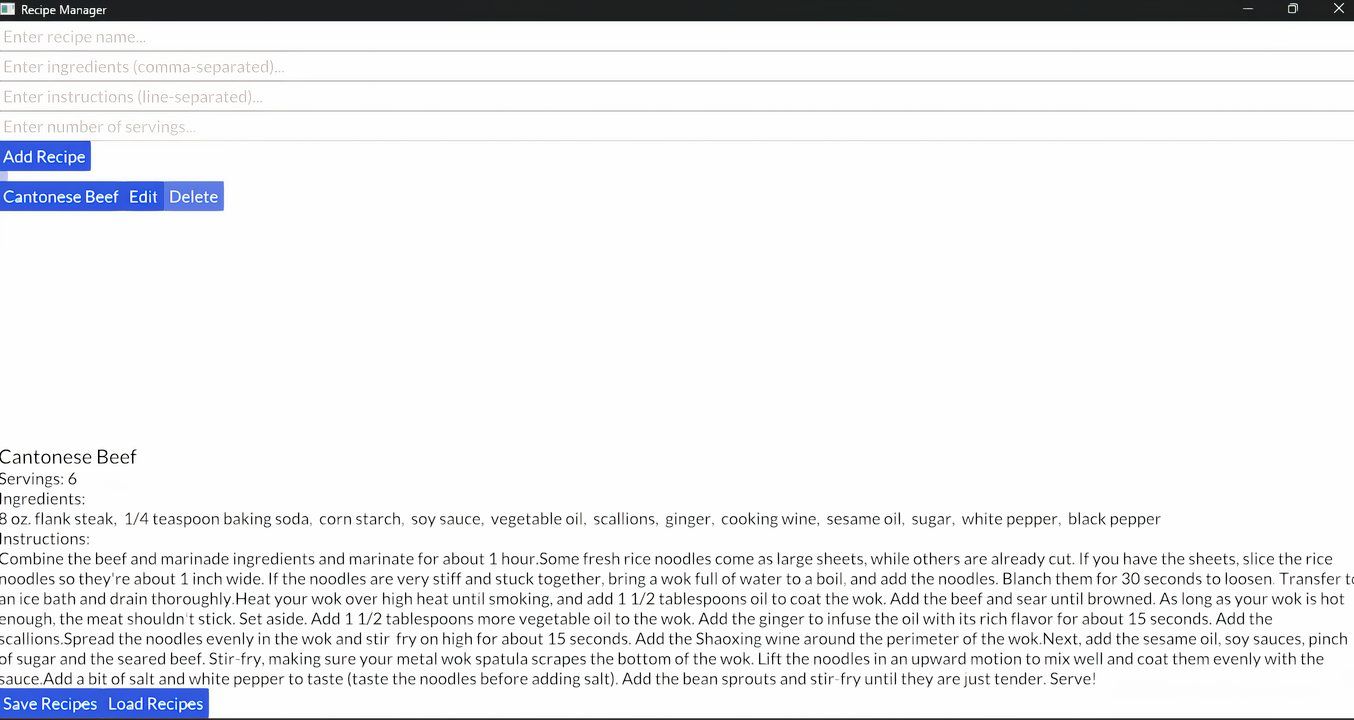
Then wait for the update to finish downloading and run the program again. Our final recipe manager looks something like this:
As always, you can get the complete code for this project on my GitHub. This project is pretty barebones, but there are some things that you can do on your own to make it look better. You can potentially develop a robust recipe manager out of this. At the end of creating this recipe manager, you should have a good idea of what Rust is capable of.

