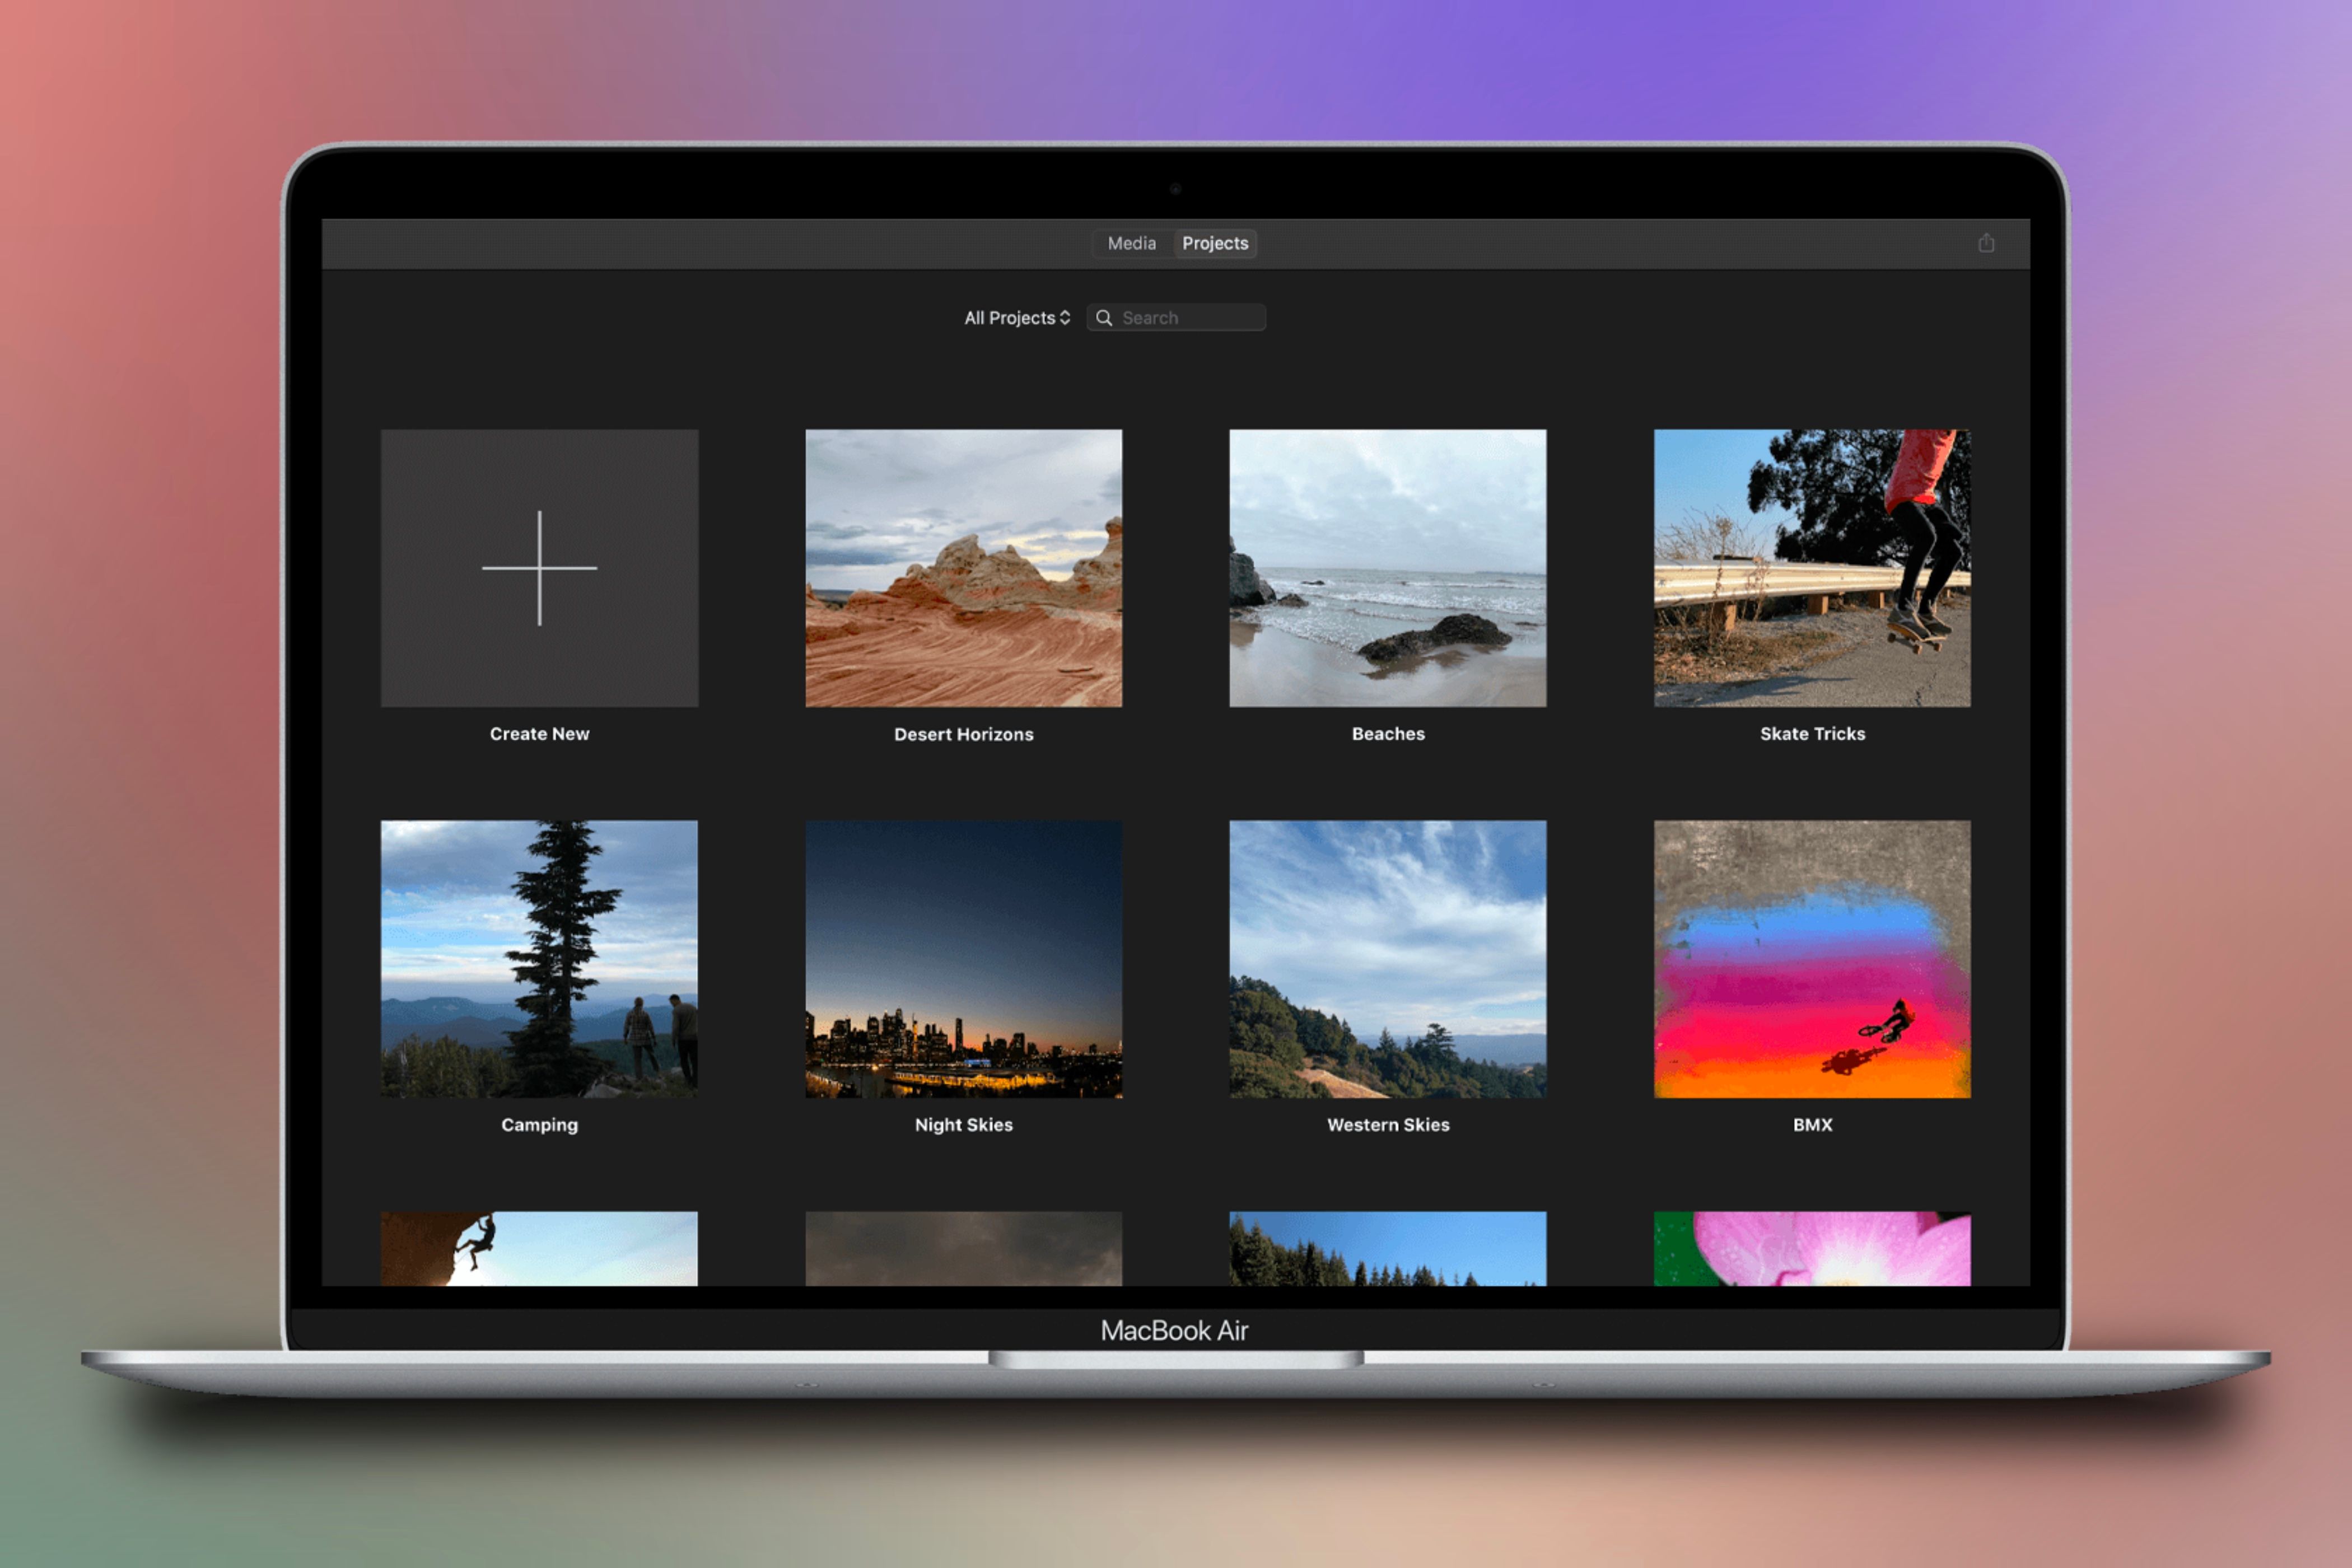
iMovie is seen as the weaker link compared to Final Cut Pro, but there’s more to it than meets the eye. Here are some of the best iMovie features you should be using to make your home movies shine.
Getting to Know iMovie
iMovie was first introduced on the Mac in 1999 and has since been updated, redesigned, and expanded to make capturing, editing, and sharing video content more straightforward and efficient. In 2010, Apple began offering iMovie for free when you purchased a new Mac. Today, it is available for free download from the App Store and comes installed on new Macs (it’s probably in your Applications folder).
iMovie allows you to create home videos and trailers, edit audio within each clip, and add transitions and effects throughout your project. It’s user-friendly and straightforward, and more than enough video editor for most amateur directors. When you finish your project, you can easily export it to your photo library, as a file, or share it with others on social media.
Though iMovie is also available on iPhone and iPad, the tips below specifically relate to the Mac version which is slightly different.
1 Add Video Filters to Your Clips
The iPhone takes impressive videos, but sometimes you want your shot to be more vibrant or colorful. Video filters can help.
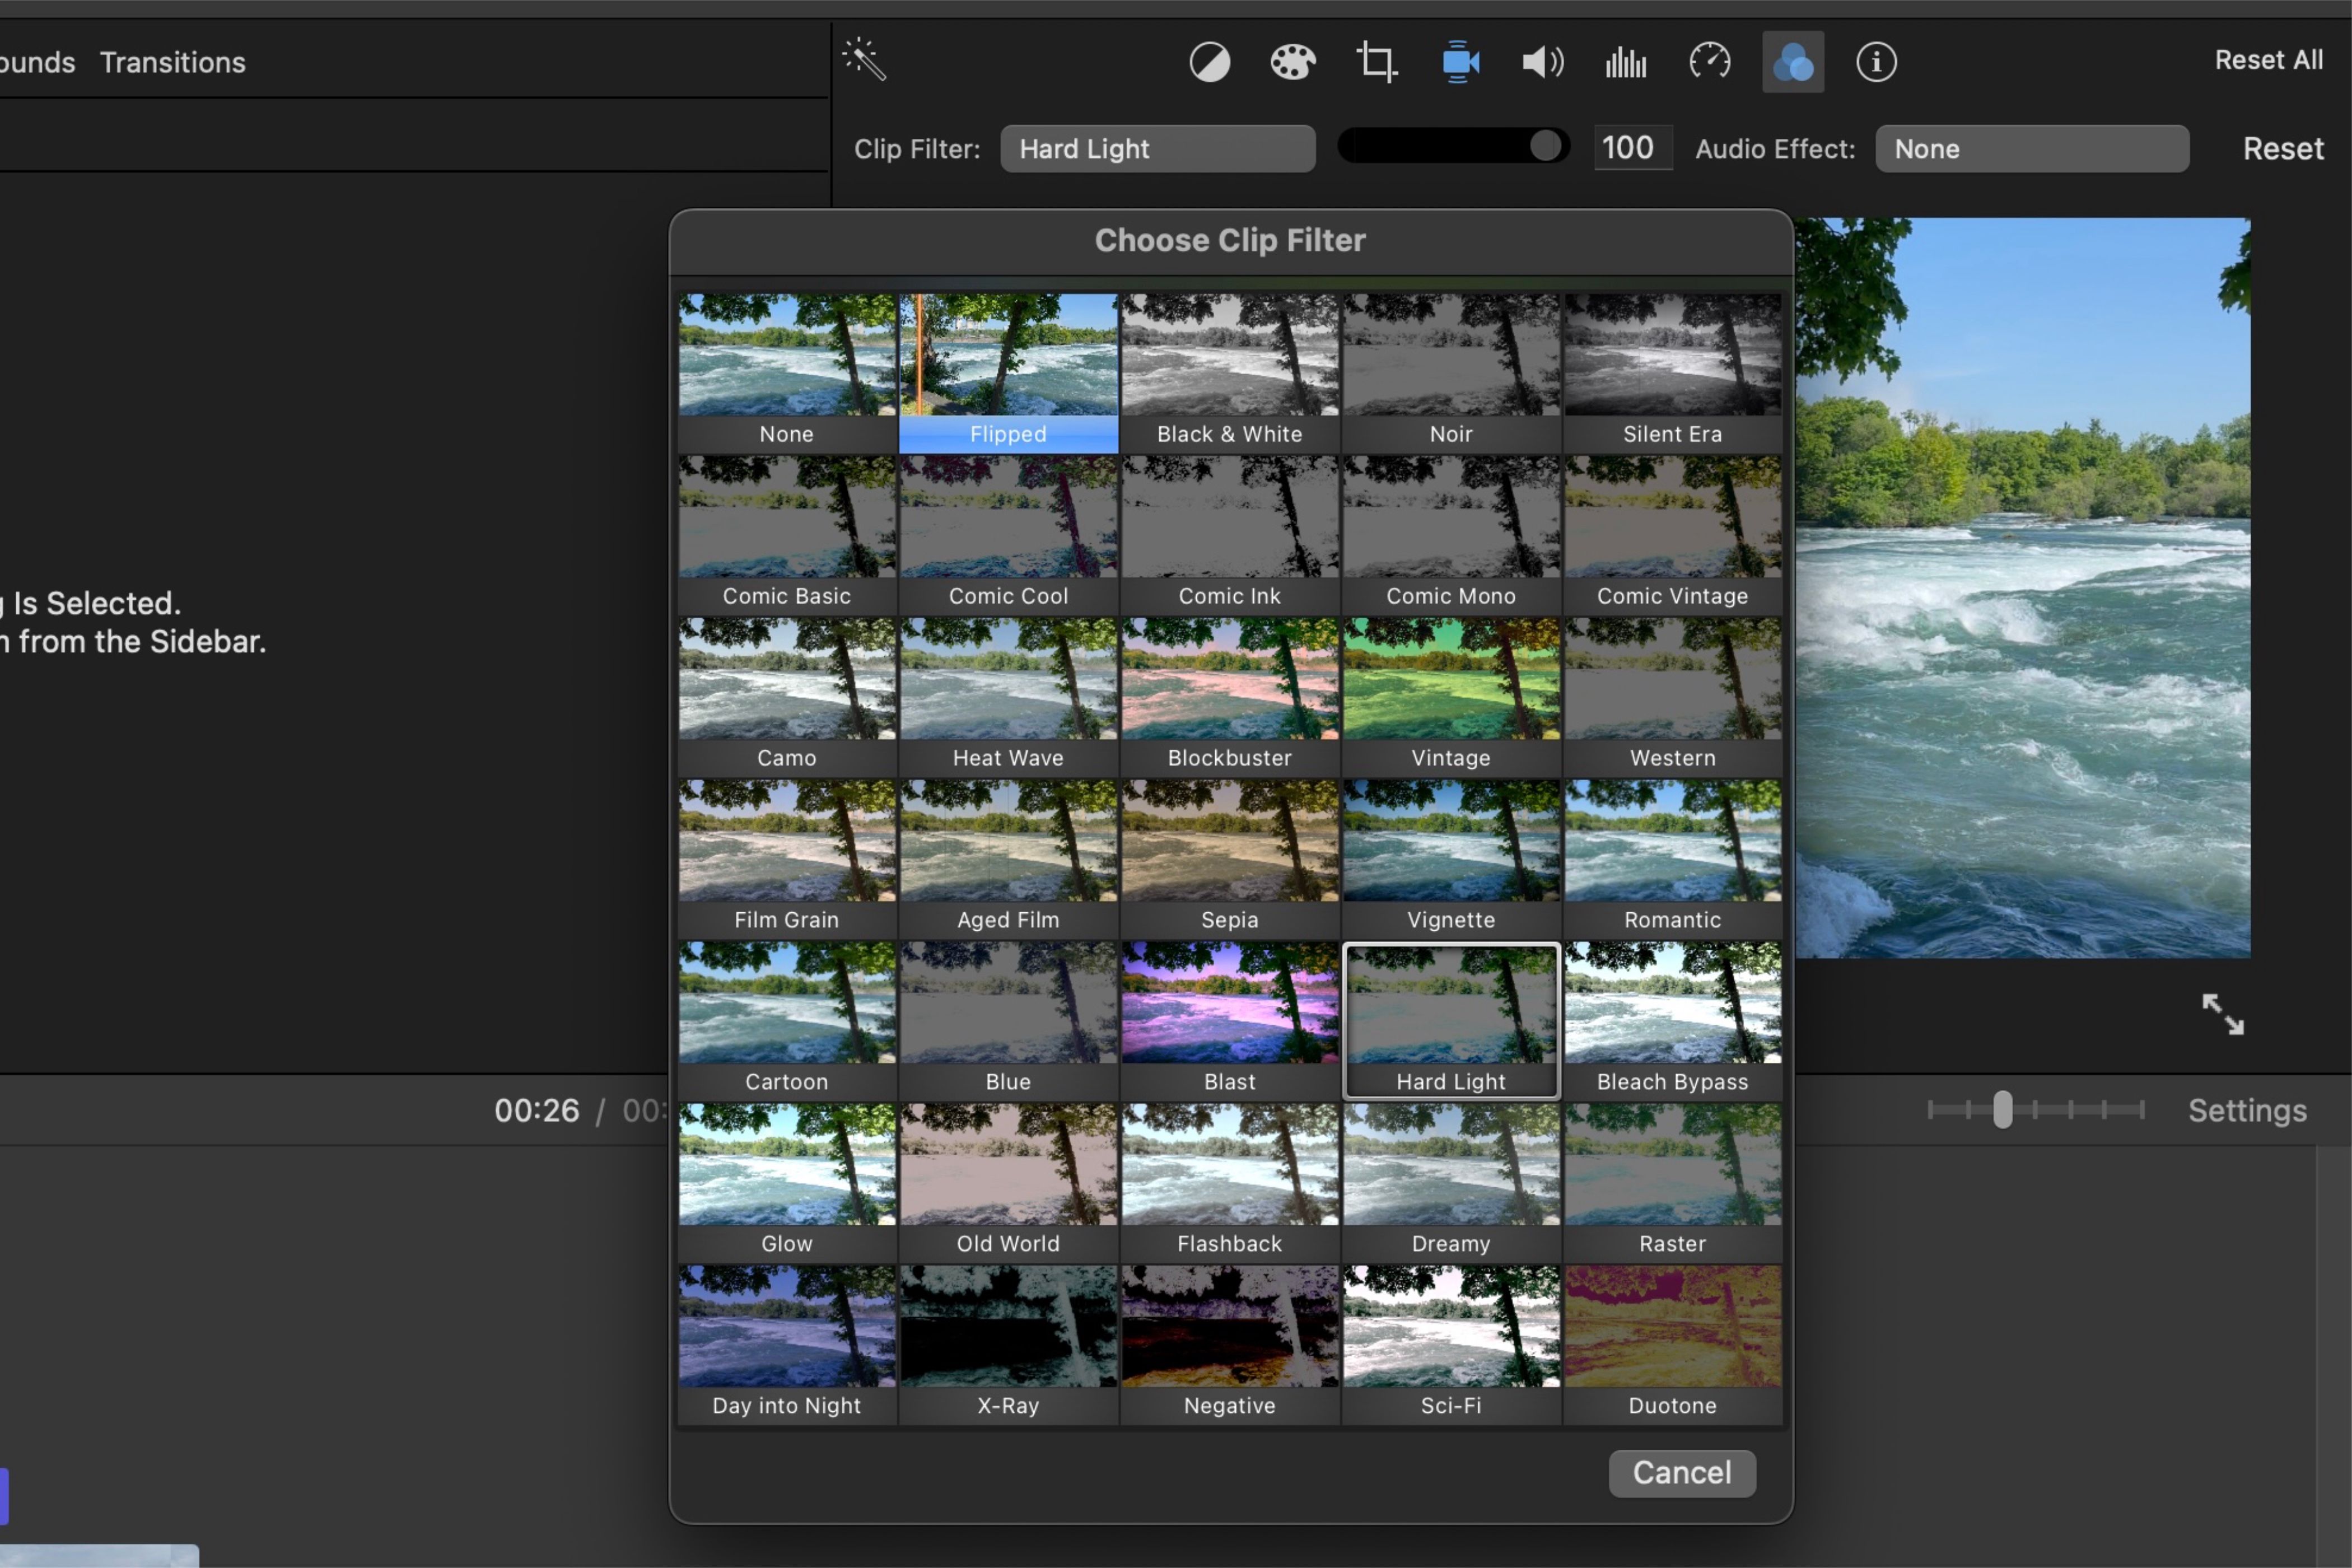
To add a filter, select your clip followed by the filter icon (the three overlapping circles) above the video player in the window’s upper right. A popup screen titled “Choose Clip Filter” will appear from there, allowing you to choose the filter you want to add to a clip.
You can choose from 34 filters, ranging from enhancing the clip’s color and shading to transforming its visual effects, such as making it look like it came from a comic book. Holding your cursor over one of the filters will show you a preview of what the clip will look like when applied. Selecting one of the filters will apply it to the clip and close the “Choose Clip Filter” window.
If you do not like the filter you chose, just reopen the Choose Clip Filter window again like you previously did and select another one. If you don’t want a filter on your clip, select the “None” filter option in the upper left of the catalog. This process is non-destructive, so it won’t affect anything but your finished export.
After you select a filter, you can modify its intensity by moving the slider next to the filter’s name above the video player. If you want to be more exact about the intensity, you can input the number in the box next to the slider.
2 Describe Your Clips With Specific Titles
Adding titles to your project, whether to add chapters to a video or to describe specific details within a clip, is an excellent way to enhance its level of detail. This is particularly relevant when presenting a timelapse of a particular subject or showcasing clips from a vacation to provide context for what’s on screen.
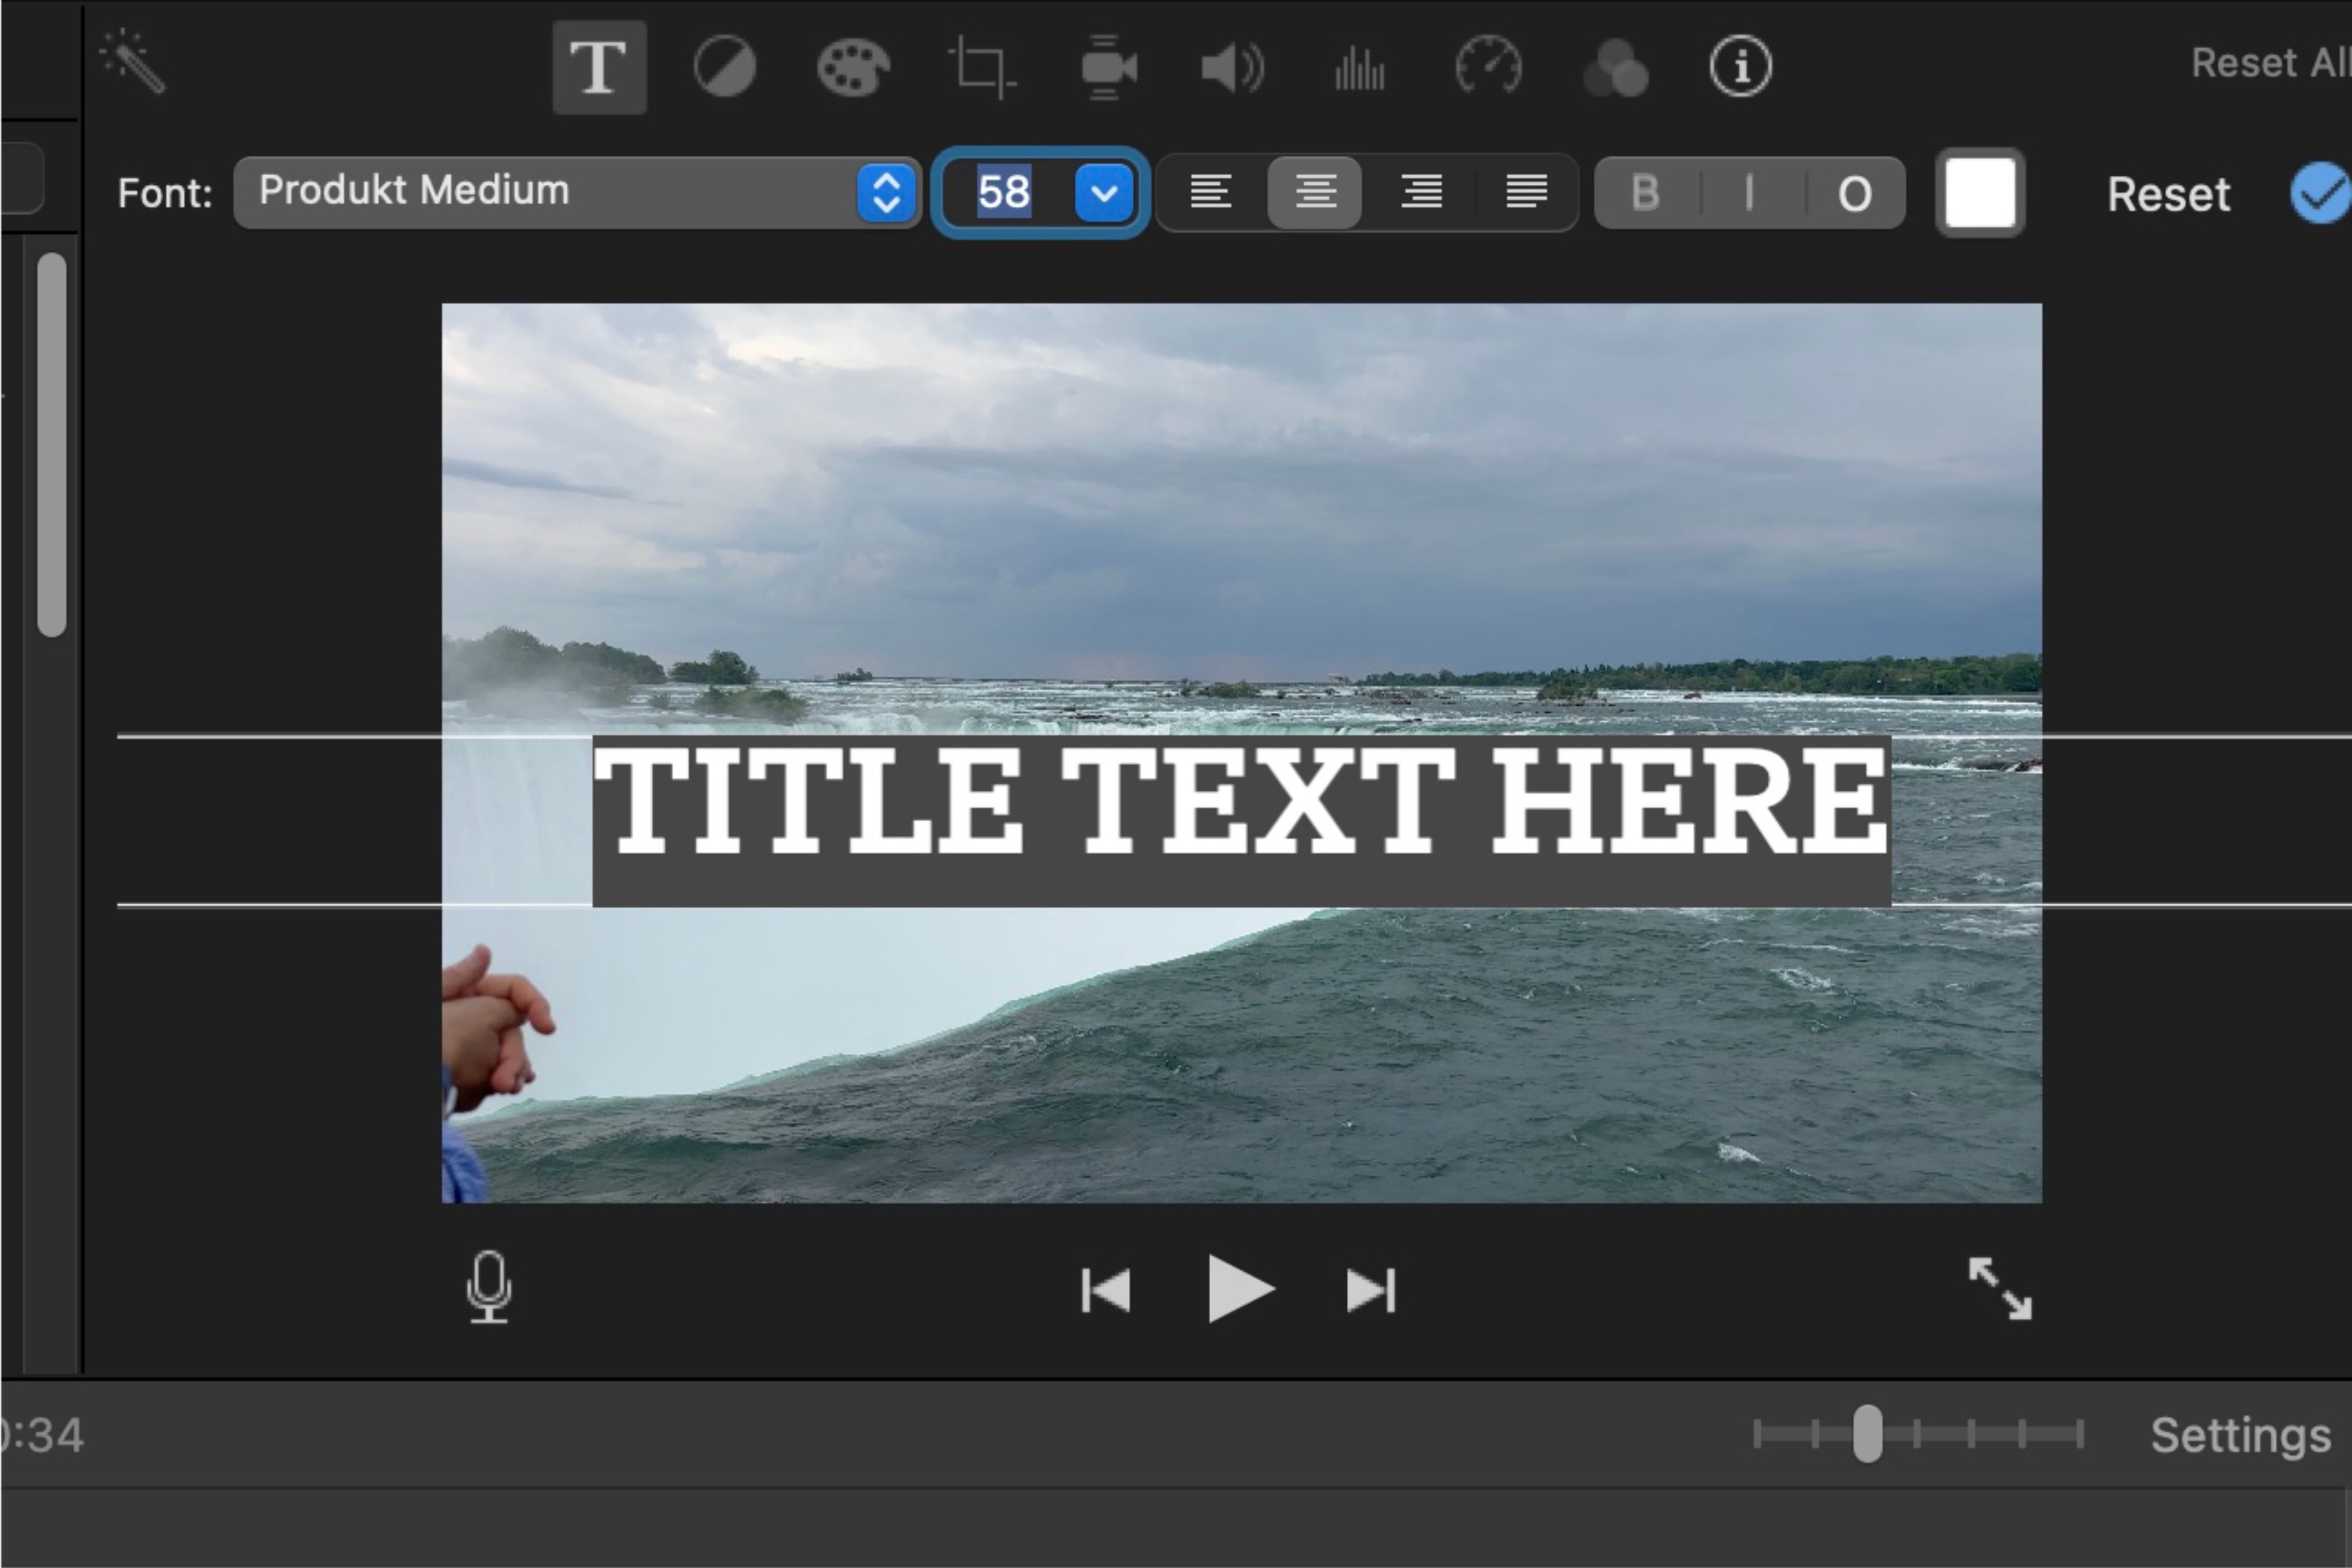
To add a clip title, click “Titles” near the upper left of the window. Select a theme from the menu or click and drag your title to a specific point in a clip. Each theme has two positions: a title theme, with the text big and in the center of the clip, and a subtitle theme, with the text on the bottom left. However, you cannot move the text from its original position.
Once you add a title, it will appear in a layer above the attached clip. Double-click on it to reveal options above the video player to customize the text, color, alignment, and size, which is how it’ll appear within the video. Initially, it’ll say “Title Text Here,” but you can change it by clicking on that text and inserting your own.
You can also shorten or expand the text’s time on the screen by dragging its section above the clip. Furthermore, you can add multiple titles with a different theme to a single clip.
3 Stabilize Your Shaky Video
While the iPhone has improved its video stabilization capatibilities, it may still be slightly shaky when shooting while in motion. iMovie can help with this, but there is a trade-off you’ll need to be aware of.
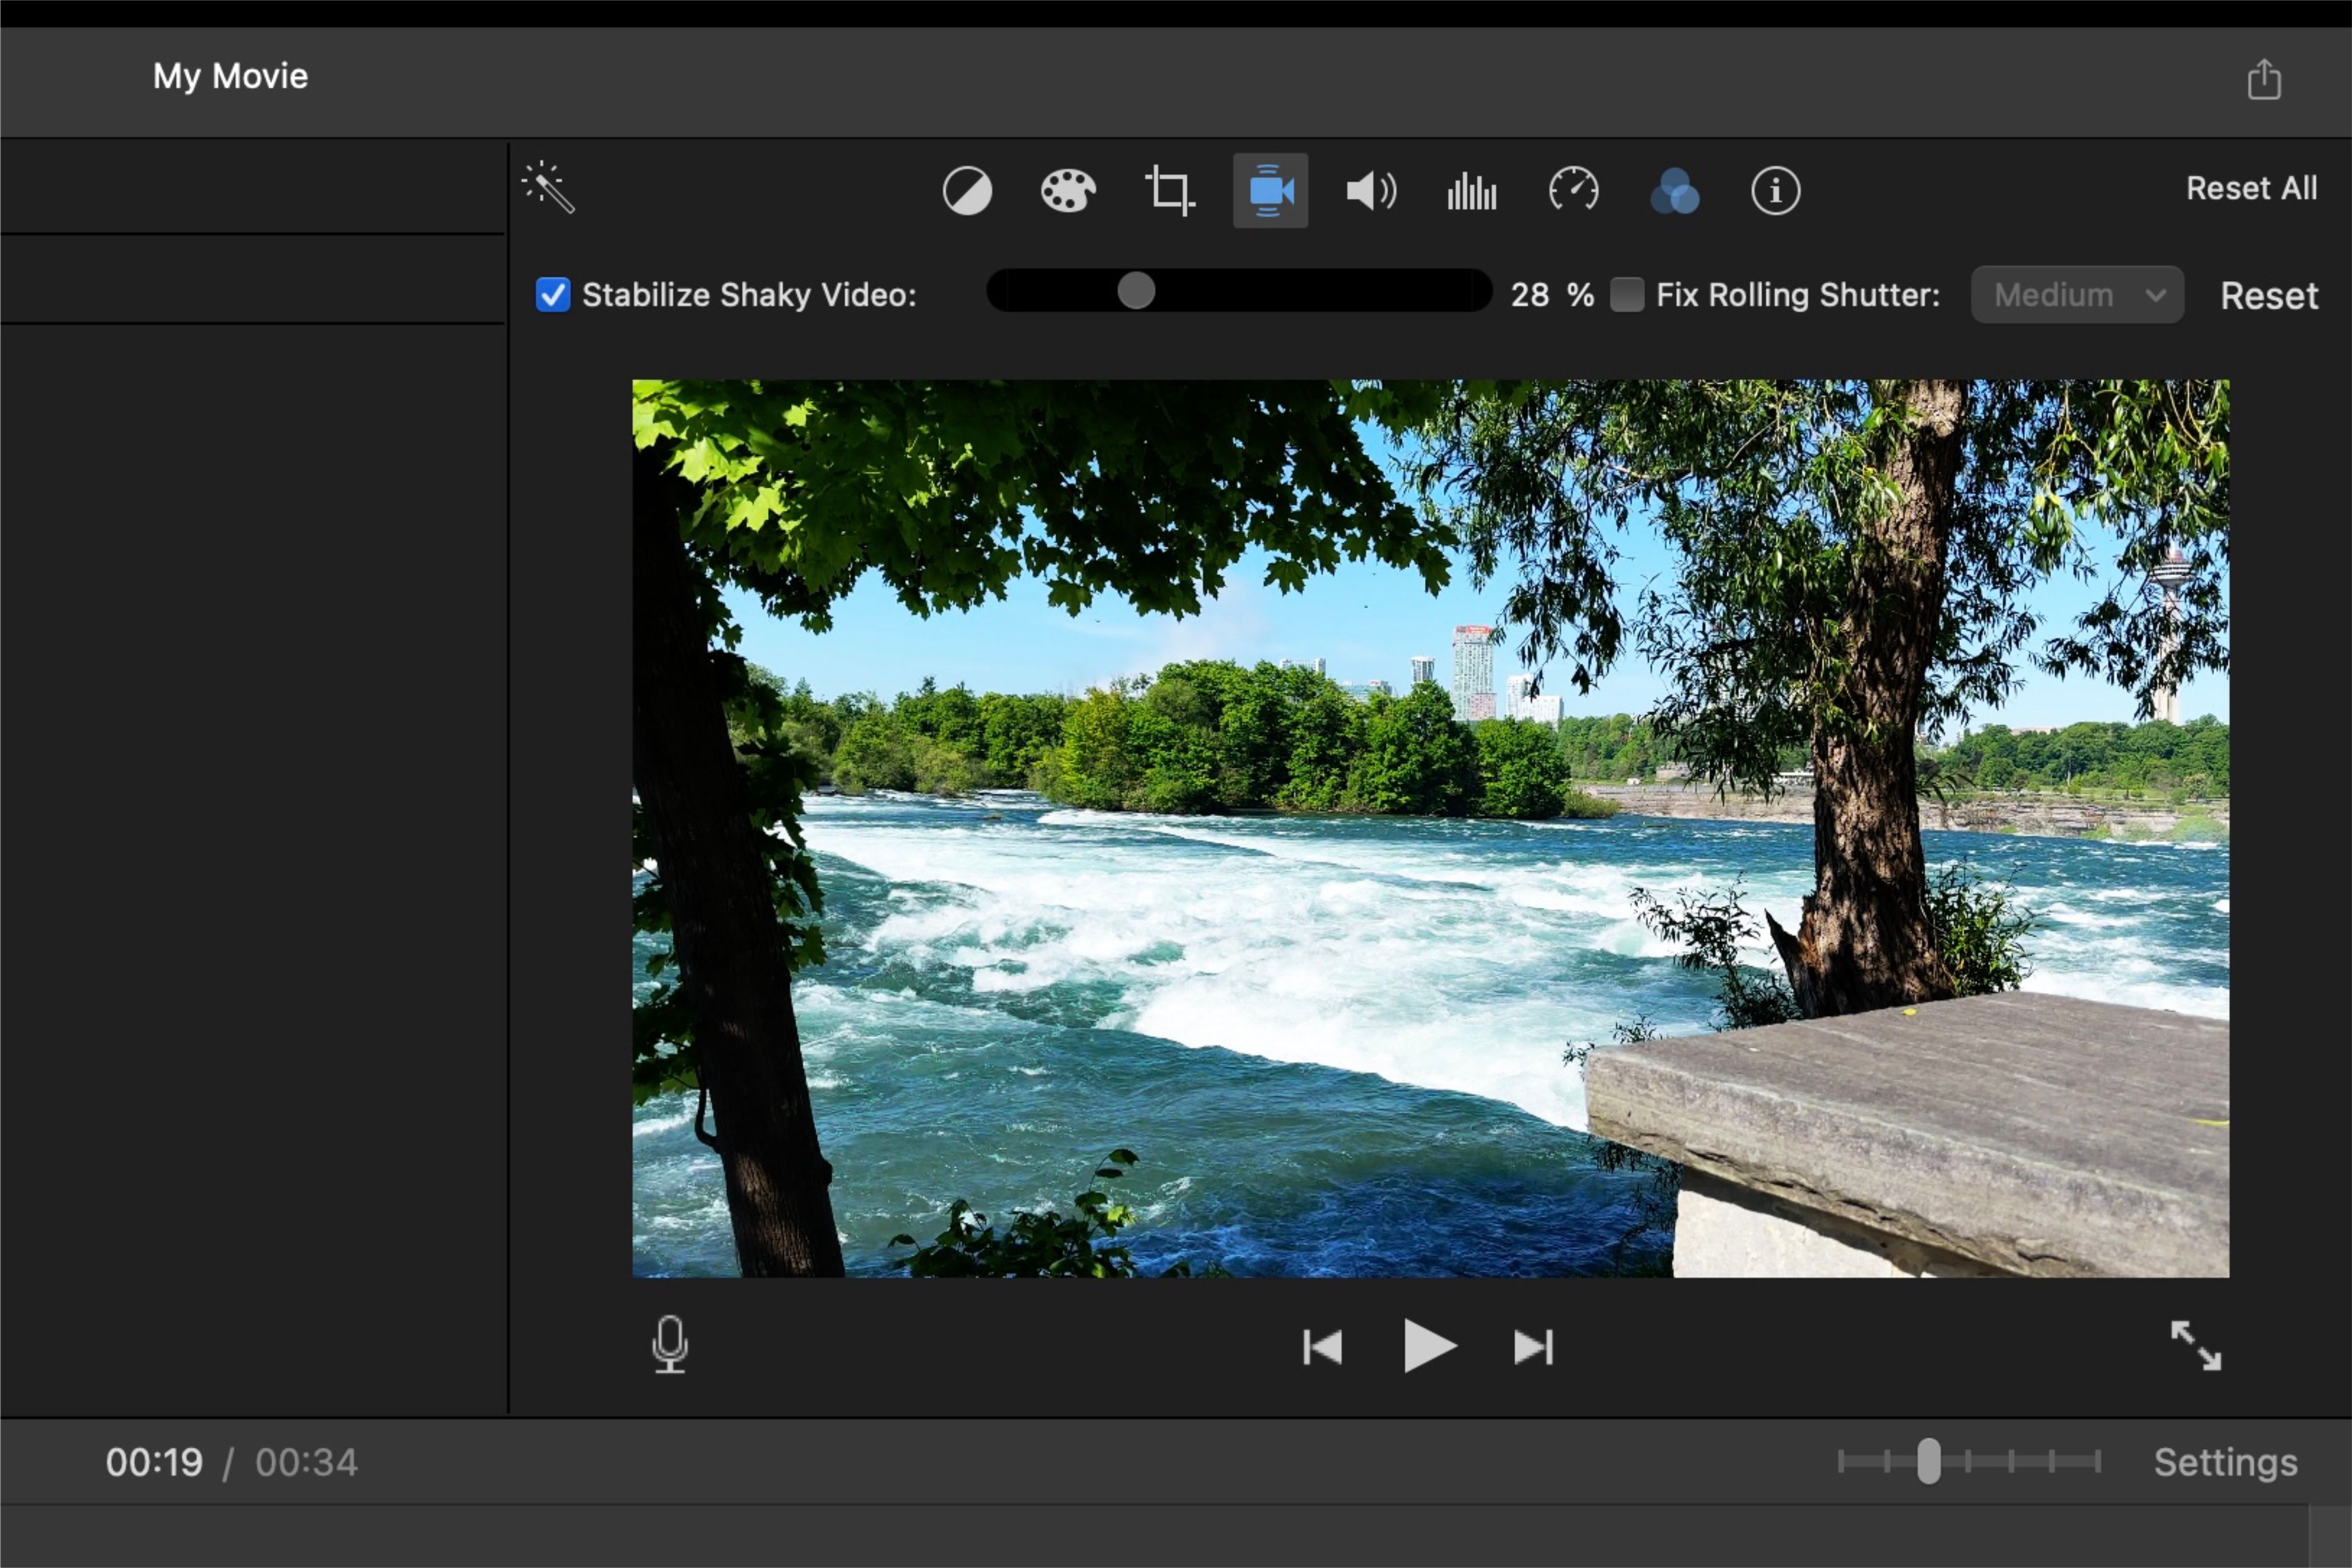
To stabilize a video, click on the camera icon above the video player and select the checkbox next to the “Stabilize Shaky Video” option. Once you do, iMovie will analyze the clip for dominant motion and where to stabilize.
Once it’s done analyzing, you can adjust how much stabilization you want to be incorporated into the video. But be careful; the more you increase the stabilization, the more cropped the footage will be. iMovie will reduce the effective size of the frame in the process.
Stabilization amount can be adjusted by moving the slider next to the “Stabilize Shaky Video” option. However, unlike filter intensity, you cannot manually type in the percentage of stabilization you want to impact your video.
4 Add Logos to Your Projects
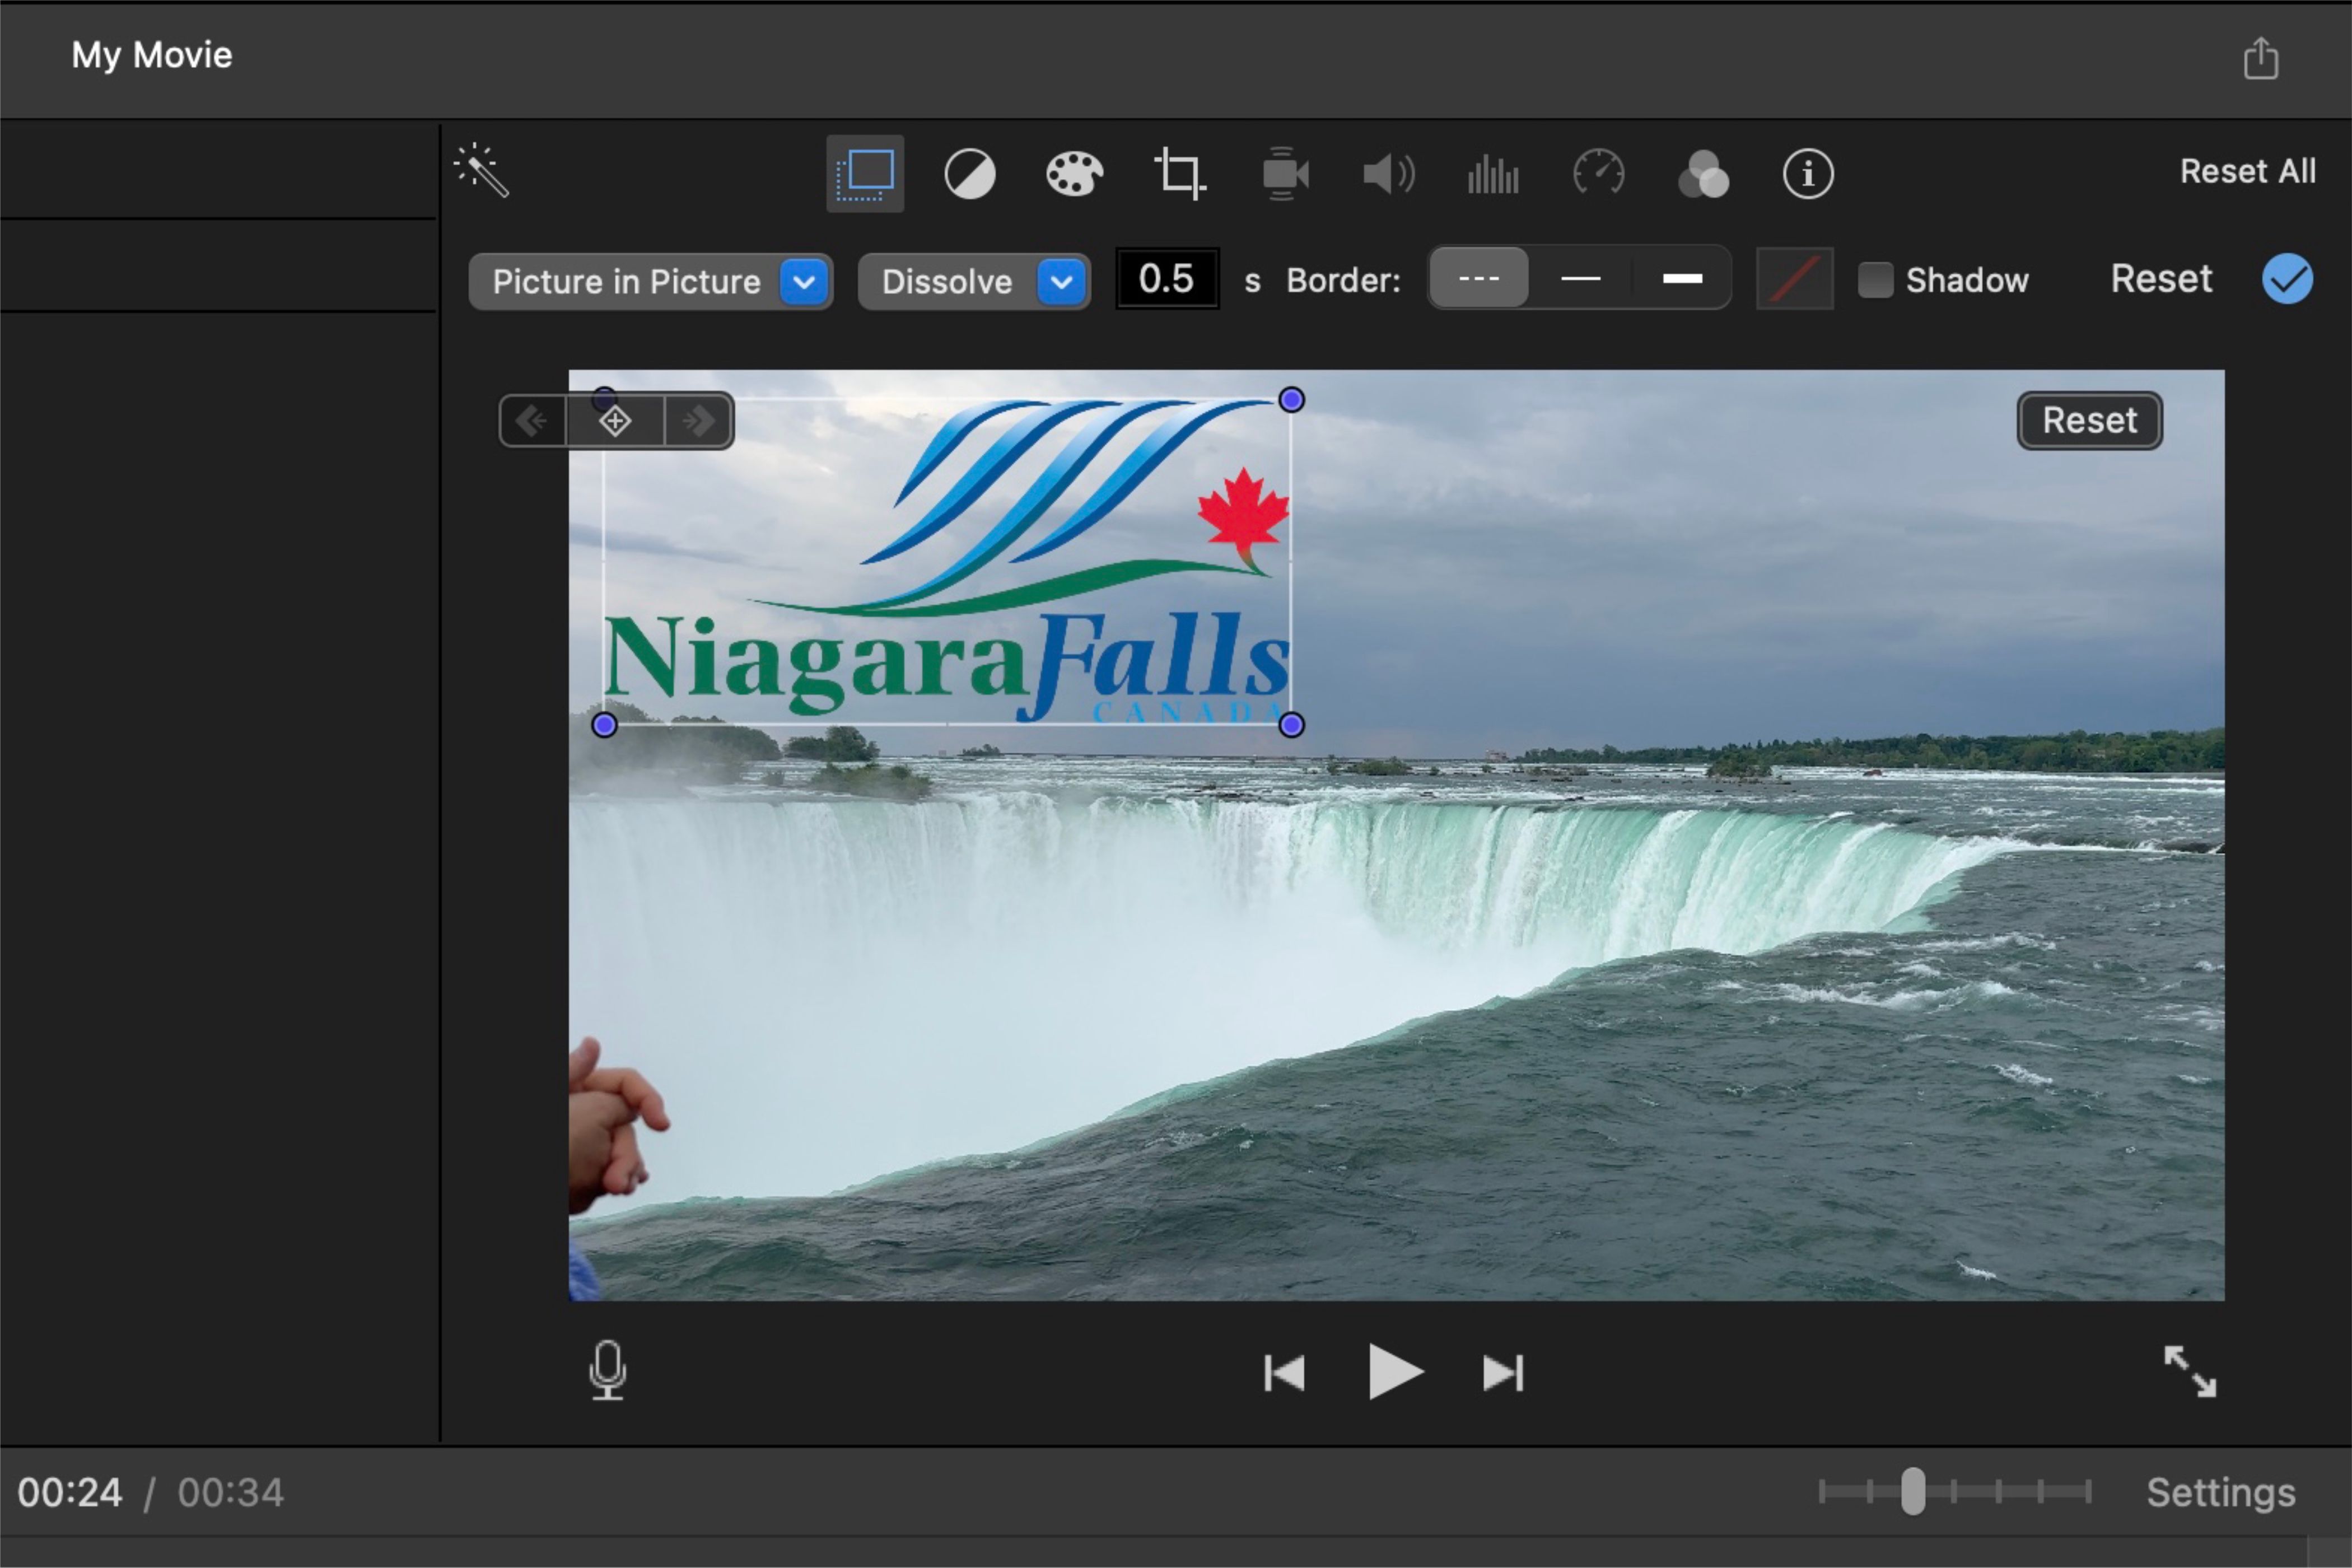
Adding logos or transparent PNG files to your projects to overlap clips is an excellent way to infuse creativity into your videos. It is a unique alternative to adding a title that describes the clip. You can even use Apple’s background isolation feature to do this.
If you’re creating a home video about your family trip to Disney, for instance, you could use a small icon representing each park in the corner of each video to indicate the location of the footage. This approach is more creative than simply adding the park’s name as a text overlay, which is a common practice.
You may not have a logo saved on your device to add, but you can usually find one online by searching for the specific brand and adding “PNG transparent” at the end of your search query. Once you’ve seen one you like, download it to your Mac and drag it into the project window. After dropping it into your project, it’ll appear in a new layer above the attached clip you want it to overlap.
To edit the logo’s size and position on the screen, click on it in the scrubber and then click on the icon with two squares overlapping above the video preview in the app’s upper right. From there, choose “Picture-in-Picture” from the drop-down menu to change the logo’s size and position.
Next to the “Picture-in-Picture” option, there’s a dropdown menu that lets you choose how you want the logo to disappear. You can select from dissolve, zoom, or swap.
5 Use the Precision Editor for Continuity Cuts
iMovie’s Precision Editor tool is perhaps the editor’s most powerful and overlooked feature. With it, you can more precisely select the starting and ending points of the two clips to achieve a smoother transition.
There are two ways to open the Precision Editor: the first is to select one of the clips you want to edit, navigate to the menu bar, select “Window,” and click “Show Precision Editor” from the drop-down menu. Another way is to double-click on the center point between the two clips you want to edit more precisely. Once you do, the Precision Editor will launch.
To close the Precision Editor, click “Close Precision Editor,” click anywhere in the scrubber, or press the Esc key.
The Precision Editor lets you precisely capture the transition moment between two clips by eliminating the need to continuously adjust both ends and starting points independently. This feature allows you to work with both clips simultaneously, so when you change the endpoint of one clip, the start point of the other clip automatically moves up.
the main reason you should use the Precision Editor is to create a continuity cut. This editing technique helps smooth transitions between two clips showing the same action but from different distances. To successfully implement a continuity cut, make the transition happen in the middle of an action rather than when it starts or ends, resulting in a smoother flow.
For instance, this technique could be used while editing a wedding ceremony video. Before the couple exchanges wedding rings, capture a wide shot of them, and when they do, insert a continuity cut for a zoomed-in shot of the exchange.
Using the Precision Editor eliminates the stress of perfecting the transition between each clip by tweaking each start and end point. It allows each clip to sync harmoniously and gives you more profound control over the transition time between them.
iMovie is an excellent tool for editing family videos or putting together many memories in a fun way. While Final Cut Pro will always be the best video editor for the Mac, iMovie is an excellent choice for the standard editor who doesn’t have extensive editing knowledge.

